
How to Disable Garage Door Sensors? 3 Easy Ways
Garage door sensors play an important role in ensuring safety and security when it comes to garage doors. However, there are situations where you might need to operate the garage door without engaging these sensors. For instance, your vehicle may be too high to pass under the sensor, or perhaps you’re seeking a quicker way to access your garage.
Luckily, disabling these sensors is possible. But it is important to know how to do this the right way. In this article, we will explain how you can disable garage door sensors so you can open and close your garage doors. So, let’s start!
How to Disable Garage Door Sensors? To disable garage door sensors, first, turn off the power to the garage door. Locate the sensors on each side of the door near the bottom and detach them from their mounts, usually by loosening the wing nuts. Finally, cut the wires connected to the sensors, ensuring you leave enough wire for future replacements.
Disabling garage door sensors is generally not recommended, as they are an important part of garage doors for safety. However, if you have decided to proceed with this step, strictly following safety guidelines is important.
Before doing this, disconnect the power supply to avoid the risk of electric shock. In the next sections, we’ll explain how you can do this in more detail.
Related Article: Can Garage Door Opener Work Without Sensors?
Table of Contents
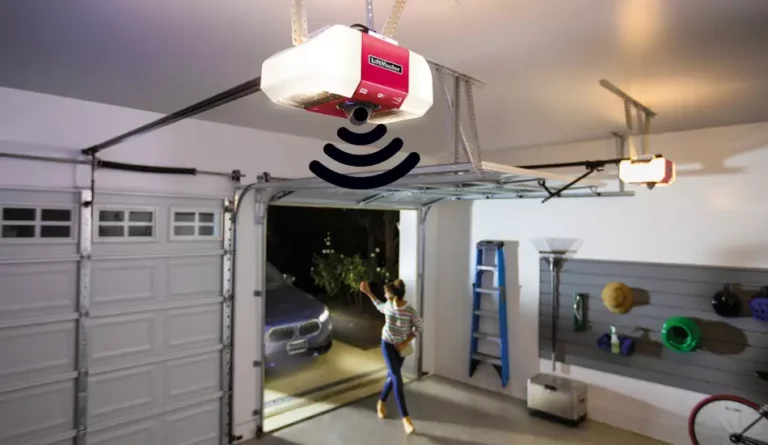
What Do Garage Door Sensors Do?

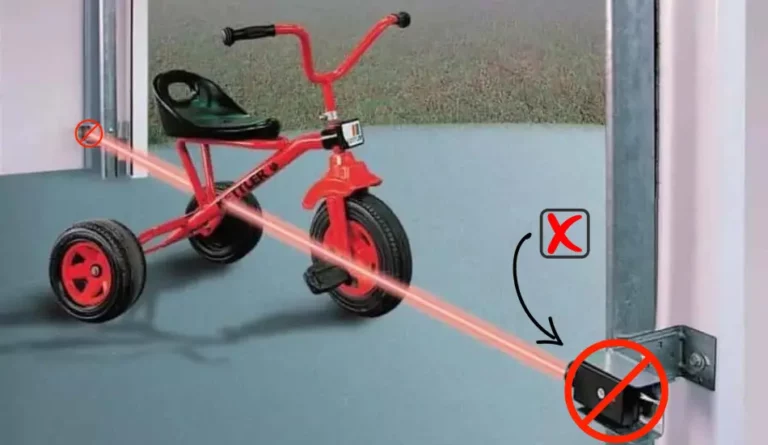
Garage door safety sensors are equipped with a feature known as the photo-eye. Positioned on either side of your garage door, usually no higher than six inches from the ground, these infrared sensors work together to form an invisible barrier.
This barrier is designed to detect any obstruction in the path of the closing garage door. When an obstruction is detected, these sensors trigger the garage door to stop closing and reverse its direction, ensuring safety.
Given their vital role in preventing accidents, it’s clear why safety sensors are an essential part of your garage door mechanism. Prompt attention and regular maintenance are advised whenever you notice any malfunctioning in these sensors to maintain the safety and functionality of garage doors.
Now that we have learned what garage door sensors are and how they function, let’s see how to disable them so we can open and close garage doors without them.
Related Article: Why Is My Garage Door Sensor Blinking Red?
3 Ways To Disable A Garage Door Sensor
In this section, we’ll go through 3 different ways on how you can disable garage door sensors.
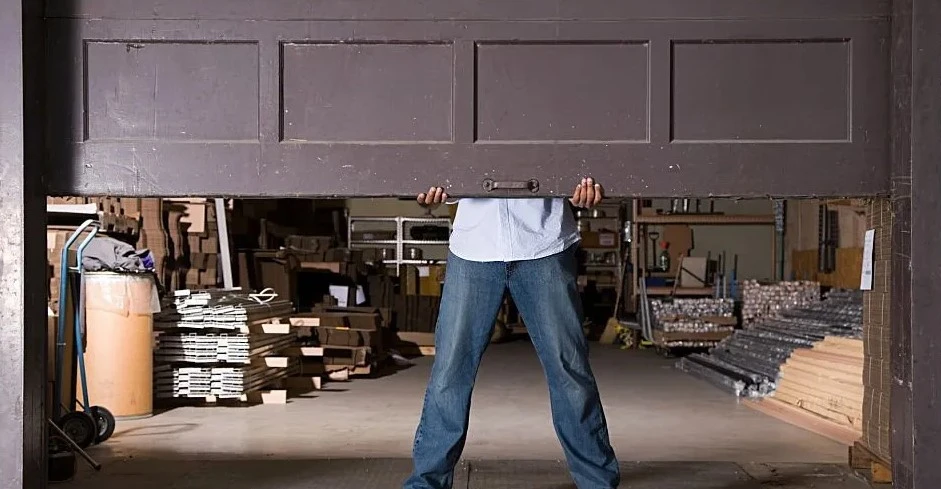
Method 1: Placing the Garage Door to Manual Mode
This step-by-step guide shows a straightforward method for disabling the sensors and manually controlling your garage door, ensuring you’re not left stranded in case of a sensor malfunction. Here is what you need to do:
Step 1: Make Sure That the Garage Door Is Closed
Before switching to manual mode, ensure your garage door is closed. Activating manual mode with the door open could be risky, especially if the door’s spring is damaged, leading to a sudden closure. If your garage doors are stuck open, move to the next step.
Step 2: Use Support If the Garage Door Is Stuck Open
If your garage door is open and won’t close, prop it up securely. This can be done using 2x4s cut to the door opening height. If you don’t have suitable 2x4s, any robust and stable object, such as a sturdy shelf, can be used. Wedge these supports between your door and the ground to prevent the door from abruptly closing, which is crucial if there’s damage to the garage door spring.
Note! Ask someone for help in this process. This can be dangerous for 1 person to do.
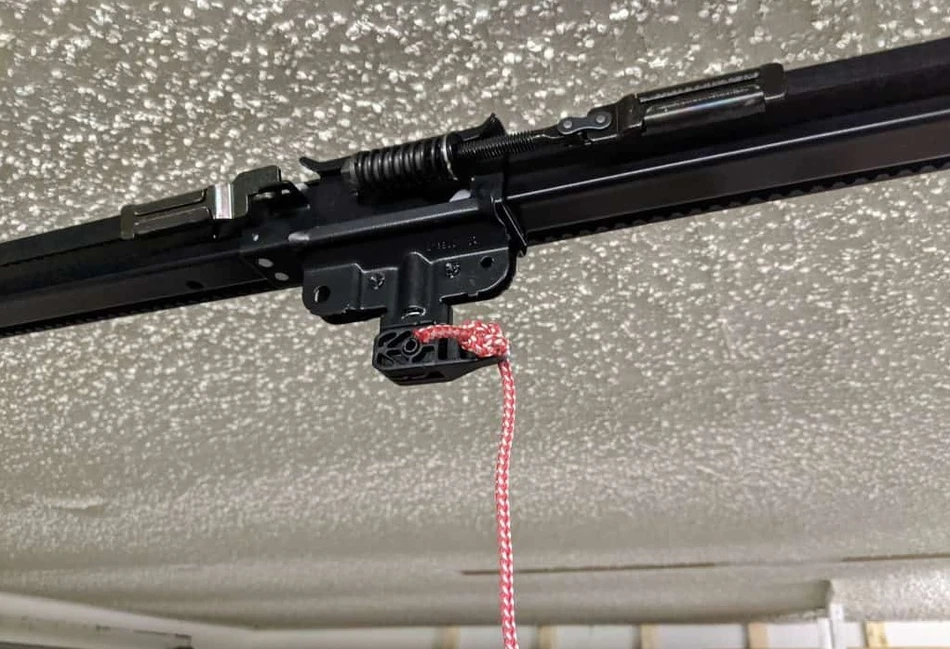
Step 3: Pull Down the Door’s Manual Release Cord

Look for the manual release cord. It is typically colored in red and placed near the garage door motor. Pulling this cord disconnects the door from the automatic system, allowing you to manually open or close the garage door. This is easy and fast. After you’re done, move to the next step.
Step 4: Carefully Remove the Supports and Close the Door
If your garage door is stuck open, you’ll need to remove the supports before closing it manually. Ask someone for help, and don’t do this alone. Gently remove the supports and slowly lower the door to its closed position.
Step 5: Reposition the Manual Release Cord for Opening
To avoid the manual release cord that interferes with the door’s movement, position it towards the garage door motor when opening the door. If this is a problem for 1 person, don’t hesitate to ask for help.
Step 6: Reset to Automatic Mode
Pull the manual release cord towards your door opening and, at the same time, simultaneously lift the door to set it to automatic mode. This action should re-engage the automatic system, allowing the door to operate automatically once again.
Remember, these steps should be carried out carefully, considering the safety implications of manually operating your garage door.
If you want to learn more about this topic, watch this YouTube video:
Related Article: How to Bypass Garage Door Sensors? 6 Easy Ways
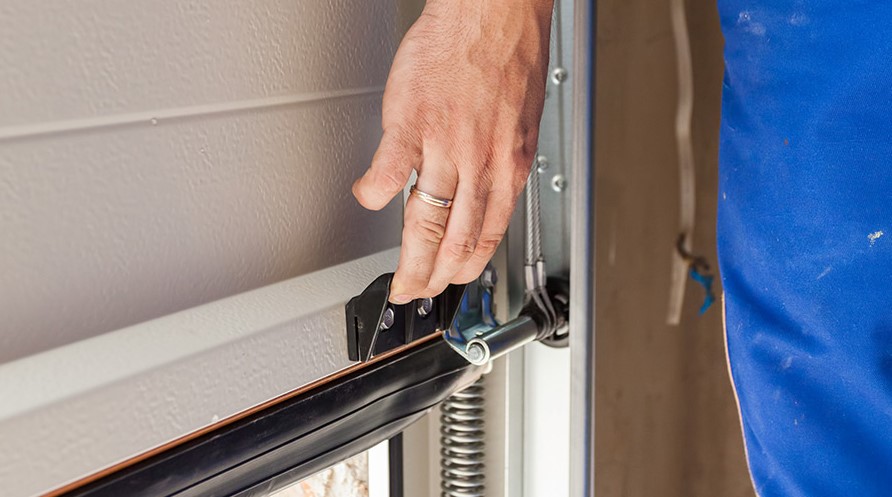
Method 2: Disconnect Your Garage Door Sensors
Disabling garage door sensors can be necessary in certain situations, such as sensor malfunctions or maintenance requirements. Here are detailed steps for safely disconnecting these sensors and ensuring your garage door operates manually until the sensors are repaired or replaced.
Step 1: Turn Off the Power to the Garage Door
Before beginning any work on the garage door sensors, turn off the power supply. This can be done by switching off the circuit breaker that powers the garage door or unplugging the garage door system from its power source. Remember, working with live electrical components can be dangerous, so ensure the power is completely off to avoid any risk of electric shock.
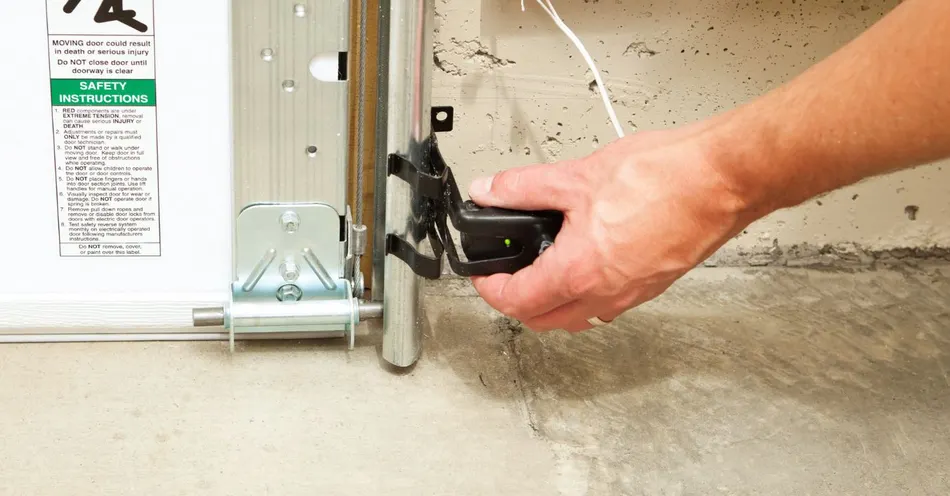
Step 2: Find the Garage Door Sensors
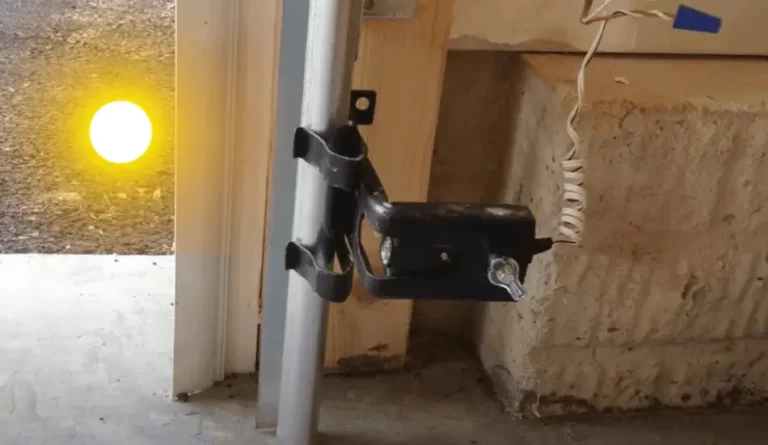
Garage door sensors are typically small, plastic devices with LED indicators located on both sides of the garage door, close to the ground. They are usually located at each end of the garage door, a few inches from the floor.
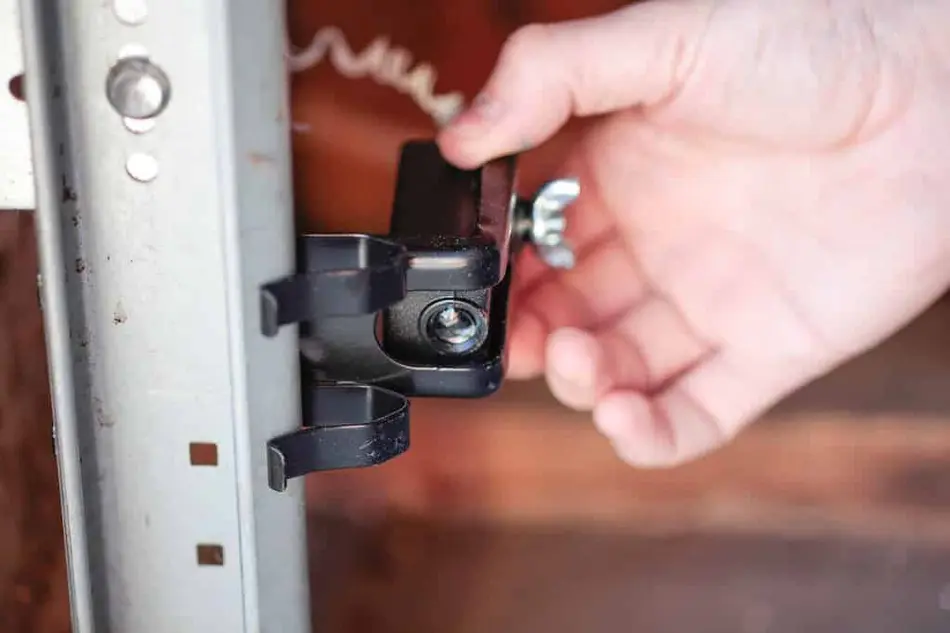
Step 3: Detach Sensors From Their Brackets
Each sensor will be attached with a wing nut. Gently twist these nuts counterclockwise to loosen and remove them. After removing the nuts, you should be able to easily slide the sensors out of their brackets.
Step 4: Cut the Sensor Wires
By using a pair of wire cutters, cut the wires connected to the sensors, leaving about an inch of wire attached to the sensor. Doing this lets you easily disconnect the sensors from the garage door system.
Step 5: Prepare for Sensor Replacement
If you plan to install new sensors, the next step involves preparing the cut wires for reattachment. Strip the ends of the cut wires to reveal the inner metal wiring. Connect the black wire from the old setup to the black wire on the new sensor, and do the same for the white wires. After making these connections, place the new sensors back into their brackets and secure them firmly with the wing nuts.
By following these steps, you can safely disconnect your garage door sensors from your garage. Remember, after disconnecting the sensors, your automatic garage door will need to be operated manually until the sensors are reconnected.
Method 3: Troubleshooting Garage Sensor Problems
Troubleshooting garage door sensor issues can be crucial in ensuring the smooth operation of your garage door. Here’s a guide on how to effectively address common sensor problems, which may help in avoiding costly repairs.
Step 1: Remove Any Obstructions Near the Doorway
The first step in troubleshooting is to clear the area around the garage door. Objects near the door or in the sensors’ path can trigger them, preventing the door from closing. Simply repositioning items away from the door and sensors might resolve the issue and allow the door to function correctly.
Step 2: Gently Clean the Sensors Using a Microfiber Cloth
Accumulation of dirt and debris on the sensor lenses can hinder their function. Clean them gently using a microfiber cloth, which is safe for the lenses and won’t cause scratches like coarser materials such as cotton or wool might.
Step 3: Look for Any Wire Damage
Look for signs of wear or damage in the wiring, such as fraying or burn marks. Compromised wiring can disrupt sensor functionality. In such cases, turn off the power connected to your garage door system and seek professional assistance to replace the damaged wires.
Step 4: Adjust the Sensors to Face Each Other Correctly
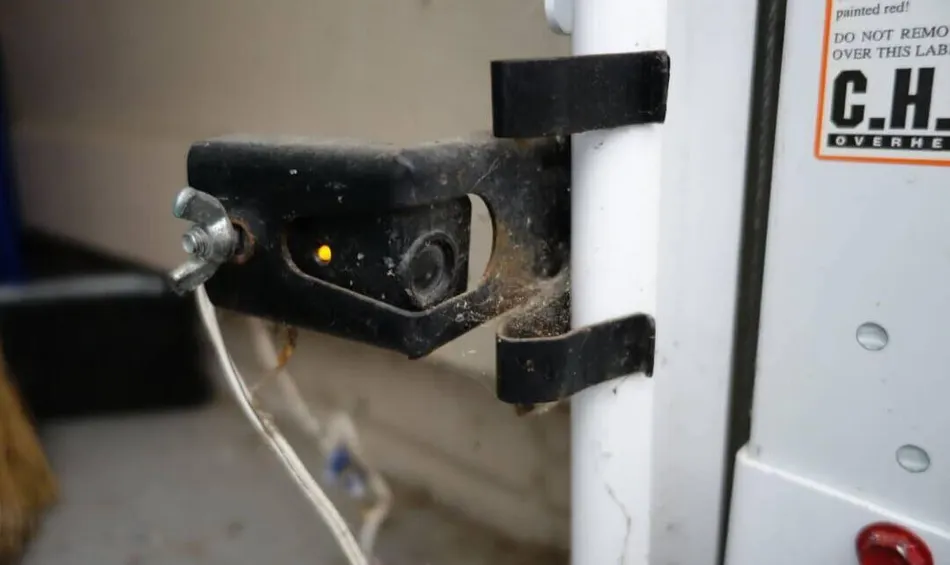
The alignment of the sensors is vital for proper functioning. Ensure they face each other directly by tightening the wing nuts, which helps them stay upright in their brackets. Also, please verify that the brackets themselves are securely attached to the garage door structure. A steady green light indicates correct alignment on a functioning sensor.
By following these steps, you can diagnose and potentially solve common issues with your garage door sensors, enhancing the safety and efficiency of your garage door system.
Related Article: Garage Door Sensor Yellow Light Having Issues?
FAQ: People Also Ask
Do you have to use the sensors on a garage door opener?
Modern garage door openers come equipped with additional sensors that are designed to identify any objects in the path of a closing door. These sensors prevent the door from shutting until the pathway is clear. However, despite these safety measures, it’s still possible to override garage door openers and their sensors when necessary.
How do I know if my garage door sensor is broken?
Check the indicator light to see if your garage door sensor works properly. A malfunction is likely if the green light is blinking or not on. A practical test involves using a cardboard box taller than 6 inches and placing it in the sensor’s path. If the garage door closes completely despite the box’s presence, it’s a clear sign that the sensors are not operating correctly.
Final Thoughts
Disabling garage door sensors is a task that should be approached with caution, considering the safety factors. While it may be necessary in certain situations, such as sensor malfunctions or during specific maintenance tasks, it’s crucial to remember that these sensors are key safety features. If you disable them, ensure all power sources are disconnected to avoid electrical hazards and follow the proper steps for detaching and handling the sensors.
However, it’s always advisable to consult with a professional or consider repairing or replacing faulty sensors to maintain the safety and functionality of your garage door system. I hope this article has helped you, and if you have any additional questions, feel free to comment below.