
How to Remove Glued Down Wood Flooring From Subfloor
There is usually a lot of reasons why someone wants to remove the wood flooring, but there are also a lot of rules on how to do this properly. The adhesive can sometimes be very strong, which can cause non-reversible damage to your floor if not removed carefully and well. In this article, we’ll talk about how to remove glued-down wood flooring and much more. So, let’s start.
Table of Contents
How to Remove Glued Down Wood Flooring?
So How to Remove Glued Down Wood Flooring? To remove glued-down wood flooring from the subfloor or concrete, you first need to cut the boards into small pieces and remove them by using a pry bar, hammer, chisel, or scrapers. You can re-use that wood or dispose of it.
This article will introduce some steps to you that will explain the process of removing your wood floors from concrete or subfloor without having them damaged. There will also be some tips that can help you do this job easier and faster.
For those who want to learn more, be sure to read What Is The Ideal Basement Humidity Level?
Step-By-Step How to Remove Glued Down Wood Flooring
The reason for removing your wood flooring may simply be that you are bored by the old one or maybe that the old one is worn out. Sometimes adding another layer may be an option, but not in every case, so you may find yourself in need of guidance when removing the flooring. This process can sometimes be a challenge, and it can be hard when your flooring is glued down to concrete or subfloor, but by following the steps below, you may make your project of yours easier.
Before you start with removing, be sure to get the following items:
- Hammer
- Chisel
- Long-handled pry bar
- Putty knife
- Scrapers
- Circular saw
- Reciprocating saw
- Protective goggles
- Breathing mask
- Work gloves
- Construction knee pads
- Close-toed shoes
- Painter’s tape (optional)
Step 1: Prepare Your Work Area
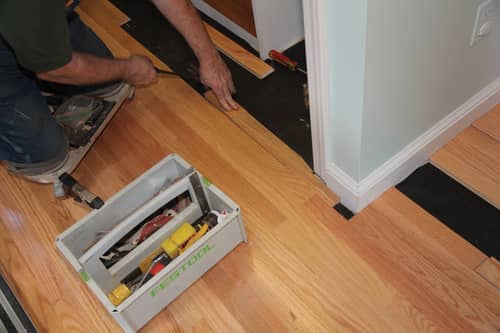
Before you start, be sure to prepare the area where you are going to work. For this step, you may need work gloves and protective goggles and also, you have to wear shoes that are closed on toes for feet protection. First, make sure to remove all the furniture from the area where you are going to work on. If some of them cannot be removed, you should cover them with plastic sheeting in order to prevent dust or debris from making them dirty. Also, cover appliances and light fixtures.
Related Article: Socket Sizes And Measurements Chart (Complete Guide)
Step 2: Measure and Mark the Area
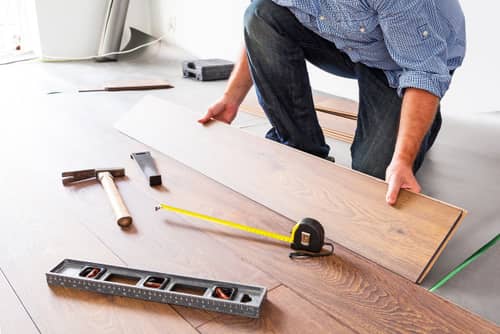
When you prepare the workspace, it is time to measure it. Start off by deciding how big is the area that you want to remove. If it is not really big, you can always mark it off with tape and only remove that part that was bothering you. You need to do this carefully in order to mark the part that you want to remove clearly. By doing this, you will save the rest of the flooring that does not need to be removed.
When you are marking the area, you should put the tape on the joint of the hardwood in the place where the removed edge will be. It can also be easier to mark the boundaries, where you will cut, with tape. This can also be a precaution since it can help keep the edge in one piece and protect it from damage.
Step 3: Cut the Flooring
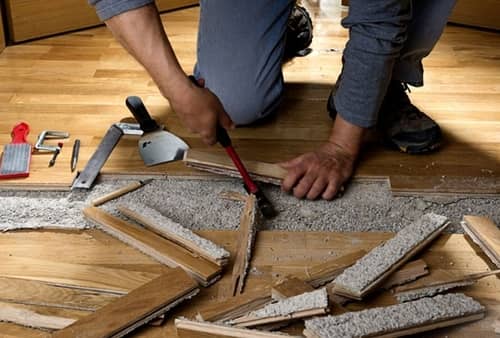
You will probably need to cut your flooring in order to remove it easier unless you have parquet flooring that is installed in small squares. Using a circular saw, cut the flooring every two to three inches and perpendicular with the direction of the flooring.
The cuts also need to be cut directly next to the line of tape that was placed on the floor before. If you can, set the circular saw blading to be as thick as your flooring. You should not cut into the tongue of the floor since it can damage the rest of the floor that is going to stay.
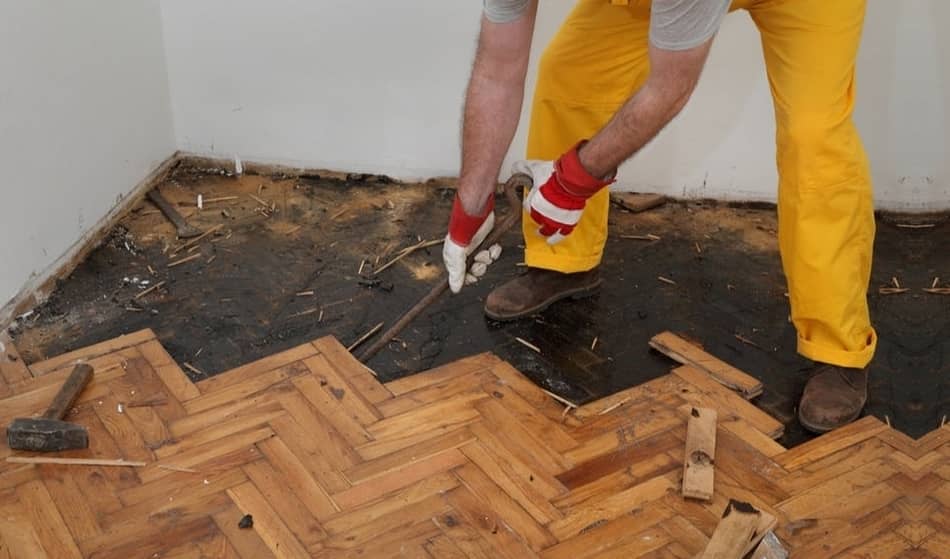
Step 4: Pry Up the Flooring
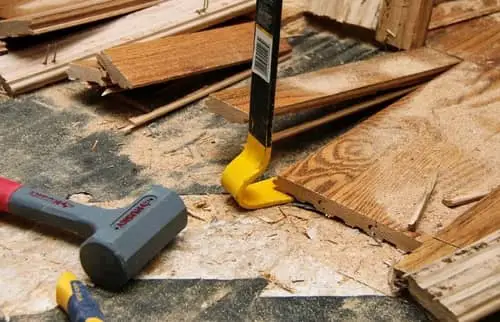
After you cut the old flooring into small sections, you can start prying it up. Sometimes this can be difficult if the flooring is glued down to the subfloor or concrete. It is much easier to remove this type of flooring since you do not have to pry it from the glue.
You will need elbow grease and different types of tools to help you remove the floor. This can include a hammer or a chisel for some more stubborn parts. The ideal tool for prying up the floor is a pry bar that has a long handle. It can also help you avoid the pain in your back that may come after the removal.
Firstly, remove the baseboards. After that, position the pry bar around the wood board’s edge and lift it. If the boards are nailed down, they will come right up. For more leverage, wedge the pry bar under the wood where each section was cut with a circular saw. If you want an easier starting point, you should look for a loose one or start on on the carpeted section.
If you’re having trouble, you can always cut a square of the floor with a circular saw. Keep in mind to set the thickness to a bit less than the floors. The square section should be 1′ x 1′ big. This thickness will allow you to cut without damaging the concrete or subfloor beneath. Pry this board up and chisel until you are able to remove the next one.
Step 5: Chisel Concrete
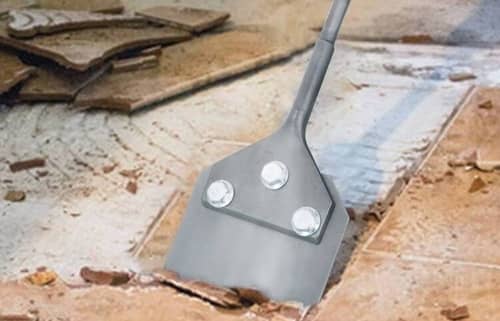
If there are some sections that are hard to remove, you can use a chisel with a handguard. A chisel also works really well for removing a wood floor from concrete. Sometimes it can be really challenging for beginners to remove glued-down wood flooring from concrete.
If the wood of your flooring is glued down to a concrete subfloor, it is harder, longer, and more complex to remove. The wood is probably going to come up in pieces because the adhesive is really strong. Using a hammer and a chisel you can scrape these pieces of wood off the subfloor and then work to the boards.
If it is hard to remove the glue or you have some larger spaces, try using an oscillating tool with an attachment for scraping. It also helps with leftover glue that is still attached to the concrete subfloor after removal. You have to press it slightly in order to push it under the glue.
Step 6: Remove the Glue
You have to remove all of the remaining glue. A long-handled hand scraper may help you remove most of the glue that is left on your subfloor. You will probably need to use a scraper attachment that goes on a reciprocating saw for some more challenging parts. The glue that is stuck on the subfloor and large spaces will usually have stronger adhesion, and it will be more difficult to remove it. In this case, a power scraper is needed.
If the glue is still not coming off, you can try to use an adhesive remover or stripper, which loosens the glue. You apply it by pouring it down and spreading it with a putty knife. You should leave it on thick and maybe need to apply the stripper again for some areas.
The only problem with them is that they can sometimes leave a residue that may damage the adhesion of your new flooring. The best thing to do is to check the warranty information of your new floor before doing the adhesive removal. This is the longest step, so if you can do it faster, it may be really good for you.
How to Know If Your Floor is Glued Down?
When you buy a used home, you do not always know how the flooring was installed. You can check the thresholds or transition pieces to see if the floor is glued down or not. If they snap into a track, they become easier for removal. If you know that your home has a concrete subfloor, the wood is probably glued down.
If you can see nails around the room it means that the wood floor is probably nailed down. Removing this type of flooring is much easier and quicker.
Is It Hard to Remove Glue on Hardwood Floors?
The glue and wood flooring in the room can be removed in just a few hours. Keep in mind that sometimes this process can be difficult if the flooring is stuck to the concrete or subfloor beneath. There were some times when it took 85 hours to remove the flooring and adhesive. Mostly, people are able to remove 10 square feet in one hour.
Renting a power tool may be a good way to remove more wood floors. Another option is to rent it from a tool rental company which mostly offers equipment rental per hour. Be aware that these machines are heavy and large and that you have to figure out how to work with them and how to put them inside your car.
How to Loosen Glue on the Subfloor?
Some tricks exist that can help you out with softening and loosening the glue on your subfloor. Soaking the adhesive in soap and warm water may help you wipe away the glue easily. A heat gun can also help with softening the glue. You should be careful while using it. Run it a few inches away from the adhesive and scrape the glue away after it softens.
How to Remove Adhesive on a Concrete Floor
This may be a challenging process because removing the glue from cement is hard. If softening the glue did not work, you can try with pure acetone or a lacquer thinner. They are made of thin cement, which may also help with this issue. They can be found at a local hardware store.
The glue can also be removed more naturally, with vinegar. You need to soak it in a big amount of vinegar and for a couple of minutes. It has to dissolve the glue so that it is easier to scrape or wipe it.
There are some other products like Goo Gone Adhesive Remover that may help with floor glue removal. You need to put a big amount of the product and leave it on to soak into the adhesive. After around five minutes, pull the glue with a putty knife. This process can be repeated a few times if it is necessary. After you managed to remove the glue, you have to wash the area with soapy water.
How Difficult Is Removing Glue from Concrete Compared To Subfloor?
This process of removing the wood floors from the concrete is messier, longer, and harder since they are glued down while the other ones are nailed down into the subfloor. The adhesive can really stick to the concrete.
There are many factors here that can determine how easy it will be to remove the glue. It may be harder to remove the one that was done professionally than the DIY one. It also varies because of the type of flooring. Some are easier to remove than others. But the most important thing is that there are a lot of products and tools that can help you with glue removal from the concrete.
Best Way To Dispose of the Old Wood or Hardwood Flooring
Trash removal companies usually do not take away construction material. Therefore, you will need to throw wood or hardwood flooring away at your local dump. Some companies may even take it but only one day in a month, and it needs to be bagged in heavy-duty plastic. Sometimes even recycling centers are willing to take this material, but you need to check your local options before doing it.
If you cannot find a place where to dispose of this waste, you can always contact a local flooring company. You can ask them questions about disposing of old flooring at your location. Keep in mind that you should never burn the flooring since the treated wood and adhesive have toxic chemicals when burning.
How to Remove Glued Hardwood Floors without Damage
If you had a plan to use the wood flooring again after removing the glue, you need to be extra careful while removing it. The best way for this is to use a standing pry bar and then lift board after board. Each one should be removed individually and pulled up carefully if you want to avoid splinters.
It would help to wipe every board with a damp cloth after removing hardwood. For better protection, make sure to place it in a cool and dry location until you decide to use it again. There are many options that you can do with old wood: sell the lumber to a local company, sand and refinish it, or save it for another project.
When Can You Reinstall New Floors?
If you removed all of the old flooring and its glue, and if the subfloor or concrete is clean then you can install new floors anytime. Sometimes it may be best to wait until the next day to let the concrete return to the moisture level that fits it or to let the subfloor dry completely.
Final Thoughts
There are many ways and methods that you can use to remove the wood flooring in your room. Mostly you will need to cut the wood into smaller pieces and then pry the boards up by using a pry bar or a combination of a chisel and a hammer.
There are also some additional steps that may be needed for the removal of the glue if your flooring is glued down. You will realize what the best option and steps for you are after you discover how your flooring is installed and after you include your preferences.
We hope that this article will help you to remove the wood flooring in your room. If you have any additional questions about this topic feel free to contact us or leave the comment below.