
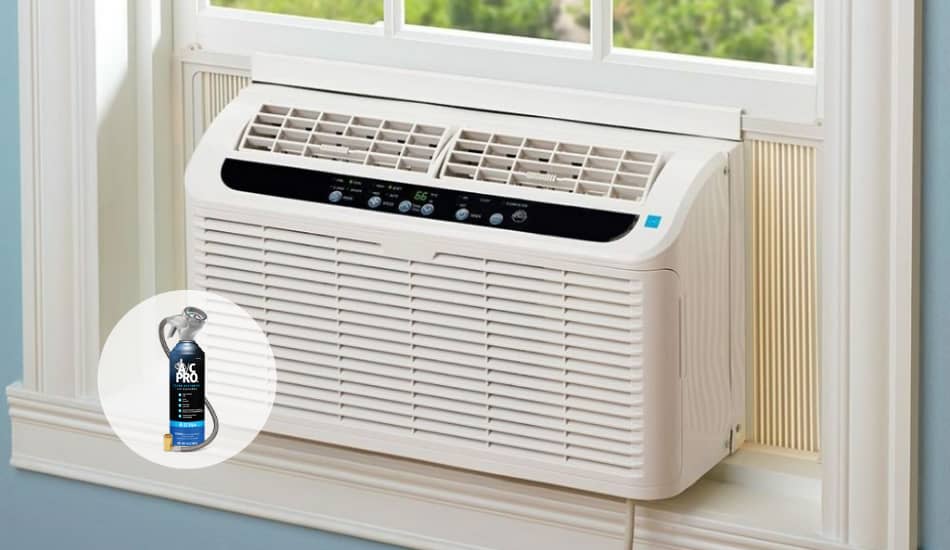
9 Easy Steps To Recharge A Window Air Conditioner
Window air conditioners are modern air cooling devices that are mounted in a window frame. As a rule, they are used in the summer period of the year, and in the winter they are turned off or dismantled. But like any other device, they may stop working (emitting cool air), which means that they need to be recharged. Recharging a window air conditioner is nothing unusual.
Window air conditioners that don’t emit cool air is because they usually have a problem with a leak in their closed-loop system. This leak causes the refrigerant to escape, and unless it is not refilled, your air conditioner won’t perform. Let us consider in more detail in which cases recharge is necessary, what affects this, and how to properly recharge the window air conditioner with your own hands.
Table of Contents
How To Recharge A Window Air Conditioner?
So How To Recharge A Window Air Conditioner? To properly recharge a window air conditioner you need to have the right equipment that includes refrigerant (R-410A Freon), a tap valve, refill-kit for R-410A, and a screwdriver. First, check for any leaks and fix them. Connect the valves to the compressor and freon kit and recharge your AC unit.
Window air conditioners have some advantages, including an affordable price, simple installation, and long service life. They do not need such frequent recharge as, for example, split systems. However, recharge window air conditioners with freon are not uncommon and difficult, but if you have never done this and you never worked with HVAC refrigerant, you will need some help to understand how it works.
There are 2 main methods that you can use to recharge a window air conditioner. The first is by using the low-cost backyard method, and the second is the HVAC tech method which is much more recommended. The main difference when it comes to these two methods is that an HVAC tech method will detect and fix the problem with a leak by adding the right refrigerant. Therefore, we will explain this second method.
| 9 Steps To Recharge A Window Air Conditioner |
|---|
| 1. Get The Necessary Equipment |
| 2. Unplug The Window Air Conditioner |
| 3. Wear The Protective Equipment |
| 4. Disassemble Your Window Air Conditioner |
| 5. Look For Leaks |
| 6. Fix The Leak On Your AC Unit |
| 7. Connect The Valves To The Compressor |
| 8. Connect The Valves To The Freon Kit |
| 9. Recharge Window Air Conditioner |
If you want to learn How To Connect Air Conditioner To Wifi, feel free to read our new article.
Things To Check Before Recharging A Window AC
Before you start recharging your window air conditioner, check to see if there might be a problem in the following things:
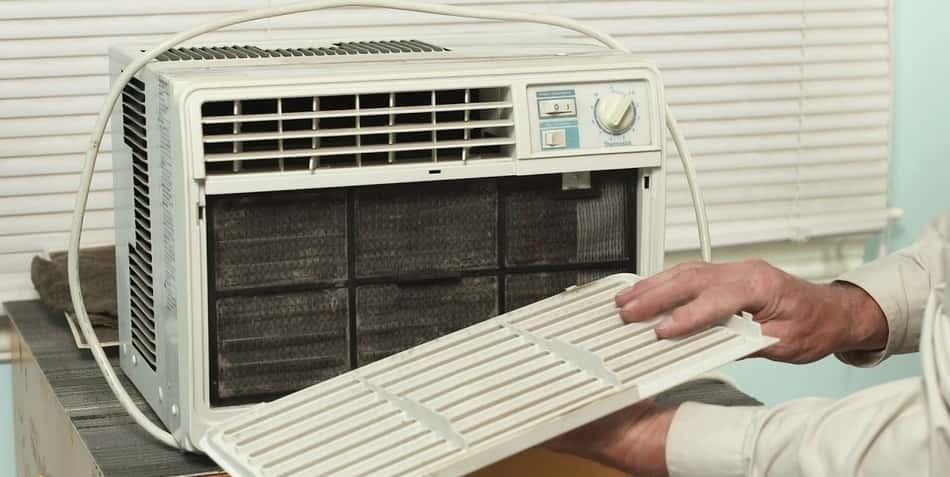
- Dirty Air Filter. Most of the small window AC units come with a removable air filter near the front. Just remove the filter and clean it. You can try to run your AC while the filter is out for a few minutes to see if the unit will start blowing cooler air. If it does, then the problem is in the filter.
- Accumulated Dust. Check to see if there is any dust, because the air must pass freely throught your AC unit.
- Fan Not Spinning. It is also possible that the fan on your AC unit has come loose. Just use a screwdriver to tight on the collar of the fan.
If none of the above is a problem, and your AC window isn’t blowing cool air, then you might need to recharge it.
9 Easy Steps To Recharge A Window Air Conditioner
Before we’ll get into the process of how to properly recharge a window air conditioner, you must keep in mind that some countries (states) don’t allow you to tinker with any of the inner parts of an air conditioner. Most states don’t allow this! That is why we recommend checking your state laws before you start with this process.
We’ll divide this process into 9 simple steps in which you will surely be able to recharge your window air conditioner. So, let’s start!
1. Get The Necessary Equipment

First, you need to get all the necessary equipment before you start the recharging process.
- Gloves – get some working gloves to protect your hands.
- Screwdriver – use the appropriate screwdriver for your model.
- Refrigerant – R-410A Freon refill. (This will cost you around $70)
- Freon refill kit for R-410A – It consists of a gauge with a hose that is connected to each side. Note, get the proper type of gauge for this type of refrigerant that you will use for your AC. (This will cost you around $30)
- A Tap Valve – This is required to install on your window air conditioner if your unit doesn’t already have one.
- Protective Eyewear -This we highly recommended when handling refrigerant.
(You can also get the HVAC Professional’s Field Guide to Universal R-410a Safety & Training)
2. Unplug The Window Air Conditioner
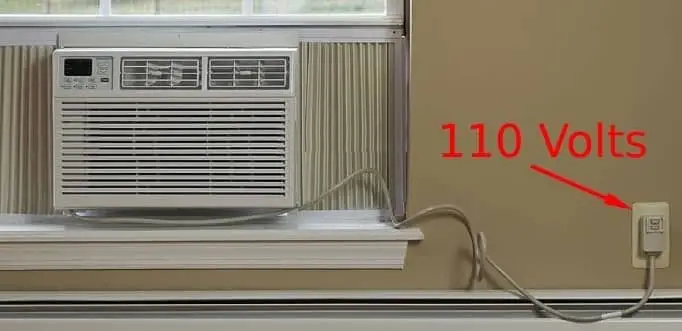
This process is very simple. Unlike normal air conditioners that are a little bit more complicated to unplug, with windows AC units you just need to unplug them from the wall socket to which they are connected. After you unplug the windows AC unit, you are ready to take them apart and look at their inner parts.
3. Wear The Protective Equipment
Before you start with the process of recharging your AC, make sure that you wore gloves and protective eyeglasses. The reason why this is important is that the refrigerant (freon) that you will be using is toxic. It can cause frostbite if it comes in touch with raw skin. That is why it is important to wear protective equipment before you start.
4. Disassemble Your Window Air Conditioner
Most of the window AC units require you to pull them apart with the help of a screwdriver. It is best to look at your owner’s manual and see how to do this properly. Every AC model is different, and it may require a different method. Older AC units require you to slide their front ends out before you lay bare.
5. Look For Leaks
Now that you have disassembled your AC unit, you need to check to see if there are any leaks. Here are the most used methods to do this:
- By Using Leak Detector: Turn on the AC unit and cover its outdoor side from the direct draft. Now use the leak detector and pass it to the probe near your AC’s outdoor unit. If the leak detector finds a leak, the device will give you a visual signal.
- By Using A Soap: Use a mixture of water and soap and lubricate all of the refrigerant gear with it. Turn the AC unit system on. If you notice a bubble formation somewhere, you found where the leak is.
- By Using Fluorescent Dye: Fill the AC system with only a tiny amount of fluorescent dye and turn it on. The dye will then circulate together with the refrigerant and accumulate on the leak sites. Simply use the leak detection flashligh to find the position where it leaks.
6. Fix The Leak On Your AC Unit
If your AC unit has a very slow leak, then it is not necessary to fix it. By just ‘boosting’ the AC system, it will be enough to compensate for any refrigerant leak. However, if there is a very fast leak, then it is required to solder the area, from which the refrigerant is leaking.
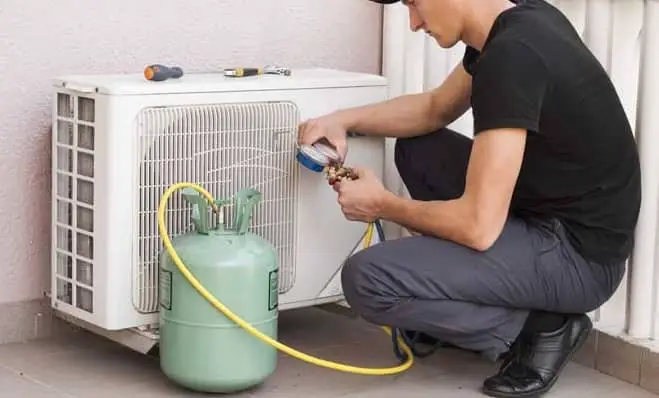
7. Connect The Valves To The Compressor
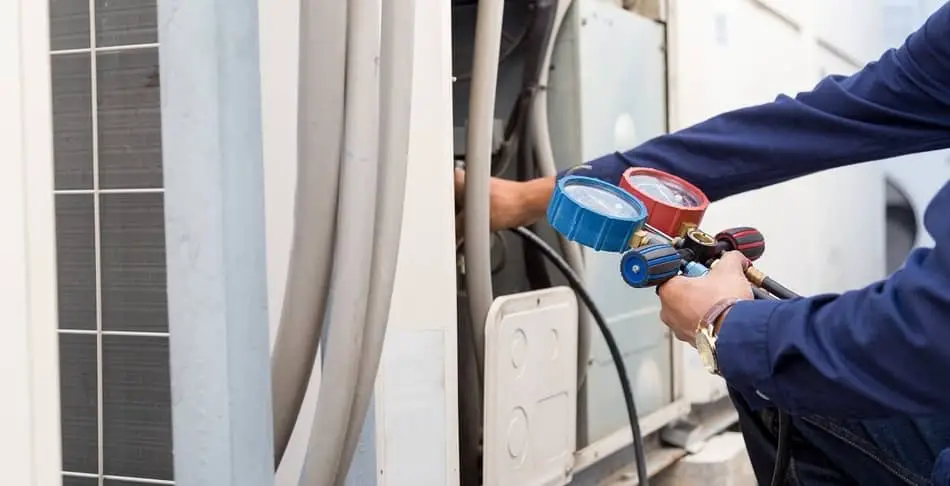
If you are not sure how to do this, go through your user manual to see where the compressor is and its two lines (service and tap valve) that are coming out of it. Now that you have done this, just attach the compressor line with the service valve. Now you will only have one free line that is coming out off the compressor. That line attaches to the tap valve. Now you have connected these 2 valves with your Freon kit.
8. Connect The Valves To The Freon Kit
Now you need to connect the two valves (service and tap valve) to the Freon’s container. If you don’t know how to do this, don’t worry. Almost all Freon Kits have a detailed process that is showing how to do it. Just use the diagram to see how to position the refrigerant Freon tank between these two valves.
9. Recharge Window Air Conditioner
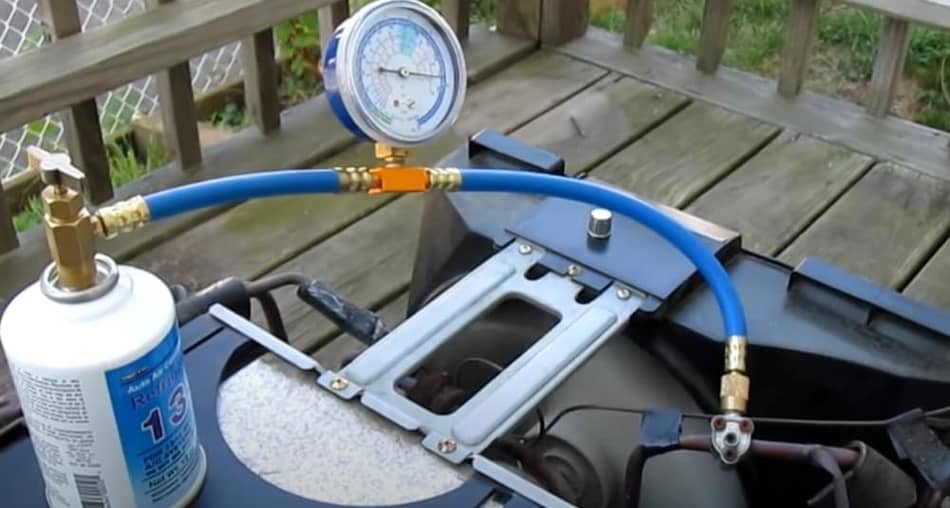
The last step is to check that everything is connected correctly and that there is no leaking. Now you can turn on your window air conditioner unit and let it run. The service and tap valves that are connected to the Freon tank, will start flowing from its tank and into the unit.
Check on your unit’s manual to see what amount of Freon your AC unit requires to operate. Once the Freon tank indicates that the matching limit has been reached, just power down the unit. Now you can unplug the AC unit, remove the service and tap valves, and turn back on your window air conditioner.
You can also check this Youtube video to see how it is done.
Things To Know About Recharging A Window AC Unit
Before you start with a recharge process, you need to understand these two important things:
1. Refrigerant (Commonly known as Freon) is located in a closed-loop system and will get low only if there is some leak. Therefore, if you have a freon deficiency in your system, you most likely have a leak that you need to locate and repair before you recharge it again. If the leak is small, then a recharge may last few more years.
2. Use The Same Refrigerant is very important. Older AC units were using R-22 refrigerant. The AC units that were built since 2000 were using R-410A refrigerant, which is the most popular type till today. The newer units contain R-32 refrigerants. Check on the label on your window air conditioner to see what type of refrigerant does your unit use.
I Can’t DIY This: Who Do I Call?
It is quite normal if you do not have any experience with repairing and fixing things that you are not sure if you can do yourself. The task of diagnosing, fixing the leak, and putting the Freon in the AC unit is quite daunting and it’s normal that most people will likely call a professional to help them in a situation like this.
Even if you decide to hire someone to add Freon to your window AC, EPA (environmental protection agency) requires everybody that you hire, to have a proper HVAC certification for this task. You can simply use this HVAC technician website to see what technicians have certification. Also, it is not a problem to find certified technicians near you to help you to recharge your AC unit. Just use the help of Google.
For people who want to learn more about Smart HVAC System, we wrote a detailed article on how it all works.
Q&A
1. Can You Put Freon In A Window Air Conditioner?
Most window air conditioner units don’t come with an installed port where you can add Freon. Generally, you will need 1 or 2 pounds of refrigerant to top off one air conditioner unit.
2. How Much Does It Cost To Recharge A Window Air Conditioner?
To hire a professional to recharge a window air conditioner can cost between $100 to $150. On the other hand, DIY refrigerant replacement kits cost $20 to $30, but in most cases, you’ll probably need to let the professional put it in.
3. Can I Recharge My Window Air Conditioner Unit Myself?
The Environmental Protection Agency (EPA) does not recommend recharging and replacing Freon on your AC unit by yourself for both environmental and health reasons. Only the EPA licensed technician is allowed to replace Freon on your AC unit.
4. How Do You Check Freon In Window Air Conditioner?
The best way to check for Freon in your window air conditioner is to see if the air that is blowing out of the unit is cold enough. If you notice that the air isn’t cooling as it should, use a thermometer and set it right next to the device while it is running. After a few minutes, see and write the temperature down.
5. How Long Does Freon Last In A Window Air Conditioner?
Typically, a window air conditioner compressor and refrigerant last around 12 to 15 years. Of course, this also depends on the maintenance and quality of your AC system and how often it is used.
Conclusion
Now that we have gone through the whole and detailed process of how to properly recharge a window AC unit, you will do this process without a problem. But, remember what we said at the beginning, it is illegal to recharge your window air conditioner if you are not a pro in most parts of the country. But even in those countries where it is allowed, I advise you to consult and pro to do this if you don’t have any experience with it. If you have additional questions or something is not clear to you, feel free to contact us.