
Standard Single-Pole Light Switch Wiring
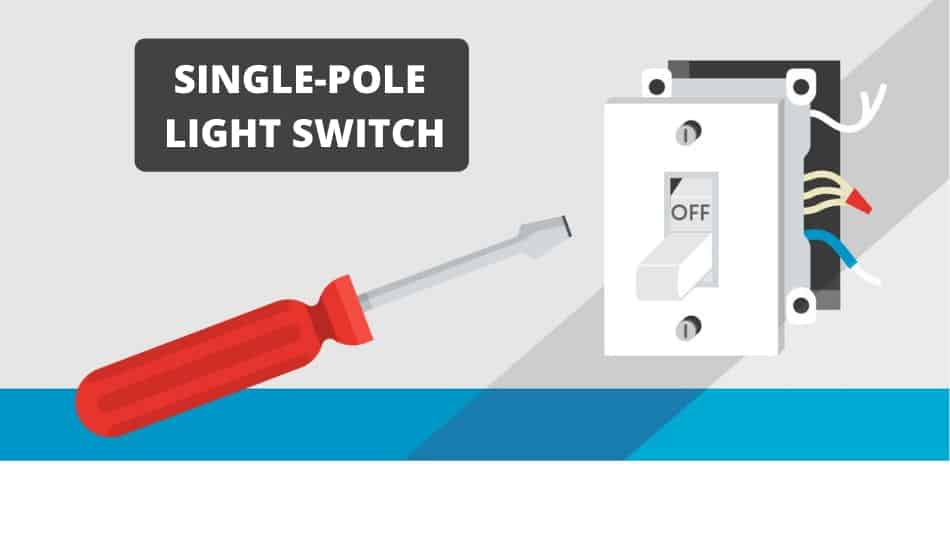
Of all the types of switches, the single-pole light switch is the simplest. This switch is the one you can find when entering a room and which allows you to turn On or Off a ceiling light for example. You can also find it on your own bedside lamp or any small table lamp as well as many small household appliances. But, do you want to know how to wire a light switch? If not, let’s start!
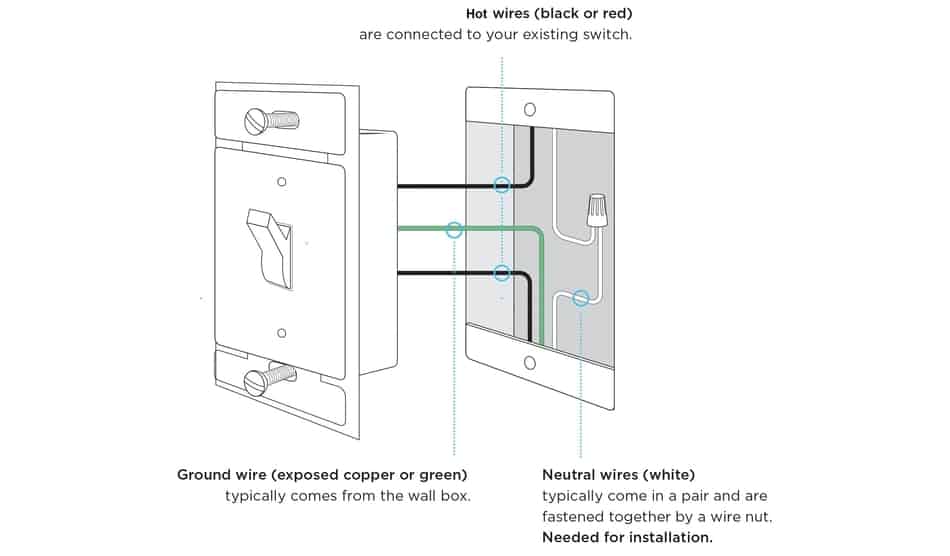
So How to Wire a Single-Pole Light Switch? To properly wire a single-pole light switch you need to connect two black (hot) wires to the traveler terminals (screws) on the switch. The green or bare copper wire is the ground and needs to be attached to the green screw terminal on the switch. A single-pole switch is connected to three wires, a ground wire, a hot wire, and a neutral wire.
This switch restores the electrical circuit depending on whether you want to turn Off or light the place where you are. A single-pole switch usually has 2 brass terminal screws that receive the black wires of the circuit. One black wire is connected to the light and the other goes to the power source.
Therefore, when the switch is turned off, the electrical circuit is opened and the electricity can’t flow through the black wire. That is why two main terminals are used and connected to black wires. If there is a circuit’s bare ground wire, it is connected to the green grounding screw on the switch.
| Steps: | Installation Process of a Single-Pole Switch Wiring |
|---|---|
| Step 1: | Turn OFF the power at the circuit breaker. |
| Step 2: | Remove the existing single-pole switch. |
| Step 3: | Remove wires from the terminals of the existing single-pole switch. |
| Step 4: | Install a new single-pole switch and connect the wires. |
| Step 5: | Turn the power back On and Test it. |
Table of Contents
Single-Pole Light Switch Wiring Diagram
Understanding the wiring diagram is very important, so you can get a better and clearer picture of how the wires should be arranged. The first step is to turn off the power to your electric circuit before you start working on wiring. I wrote an article on how you can do that: How to Turn Off Your Home’s Electricity.
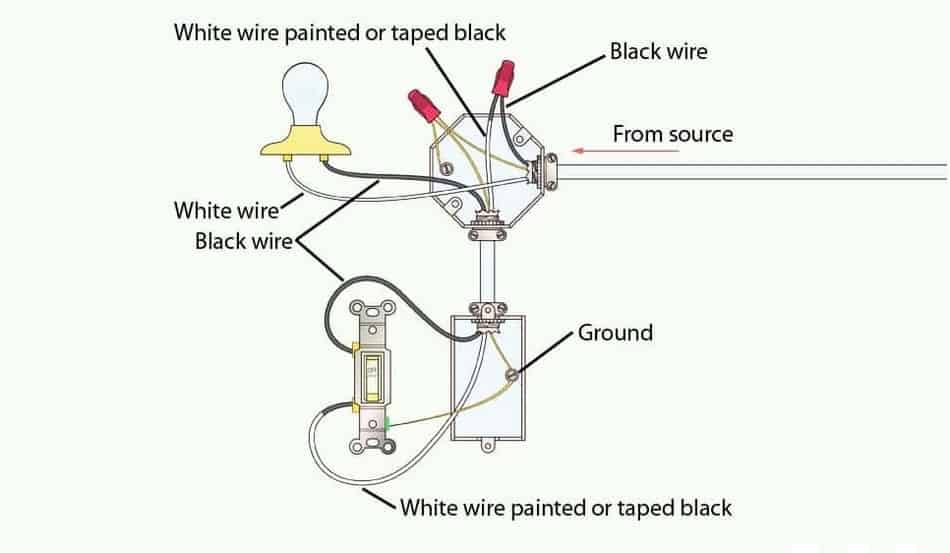
White wires in the circuit bypass the switch UNLESS a white wire is used to convert the job of a black wire. In most homes, you can find a 3-wire non-metallic cable that consists of one white wire, one black wire, and one green grounding wire.
Related Article: How A 2 Way Switch Wiring Works? Explained
As you can see in the diagram below, it’s easy to wrap the white wire with black electrical tape a couple of inches at the end so the user can easily indicate that this wire is being used as a black wire. Therefore, electrical codes(colors) may vary in this practice.
- Electrical Wiring (U.S.):
Hot Wire – Black wire
Neutral Wire – White wire
Ground Wire –Green wire (Copper)
- Electrical Wiring (Europe):
Hot Wire – Black/Brown wire
Neutral Wire– Blue wire
Ground Wire – Green/Yellow wire
Related Article: Relay Wiring Diagram (4-Pin & 5-Pin Automotive Relay)
How to Wire and Install Single-Pole Switches
What You’ll Need:
- A small flat screwdriver.
- Non-contact voltage tester
- Flexible electric wire
- Wire nut (if needed)
- Cutting pliers.
Materials:
- Single-pole light switch
- Switch Box (if needed)
Step 1: Turn Off the Power
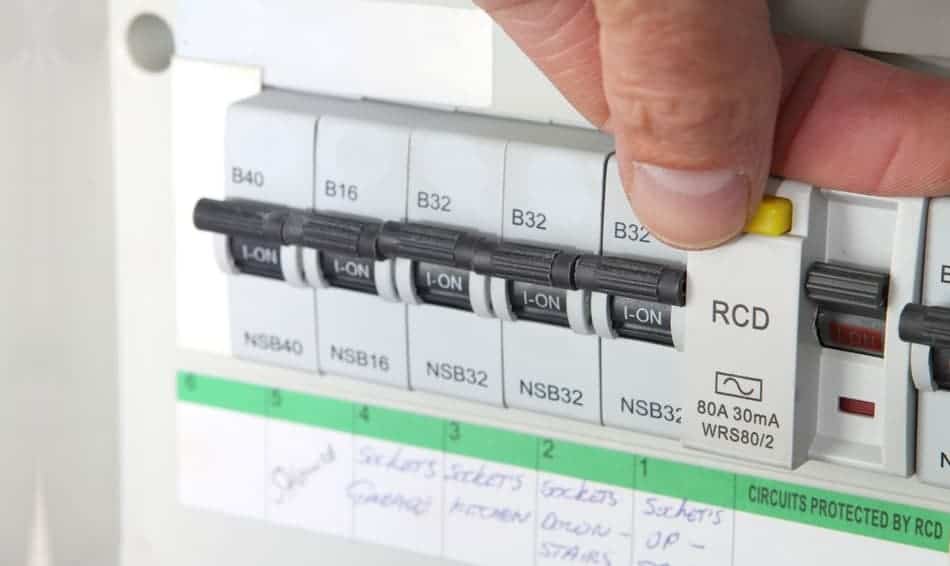
The first step in installing a single-pole switch is to turn off power to the circuit on which you will be working on. To do this, simply go to your electrical panel and turn off the circuit breaker that feeds that circuit. In case you have a fuse panel, you will need to locate the fuse that controls that circuit. Just find the fuse and unscrew it safely from the socket.
Note: Use an electrical tester to verify that the power is on before you turn off the circuit breaker or unscrew the fuse. If the tester shows power, then turn off the circuit. If the switch controls a light in the room, verify that the light is off after turning off the electrical panel. Either way, electrical safety should be your number one concern.
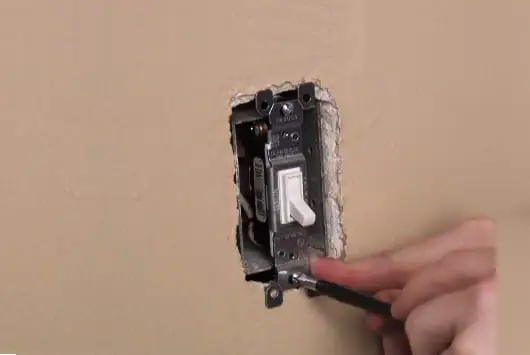
Step 2: Remove the Old Single-Pole Switch

Removing the old single-pole switch is quite easy to do. First, remove the two straight blade screws that hold the switch cover and remove the cover plate.
Before you remove the screws that hold the switch, check to see if there is a voltage. Use a non-contact voltage tester or multimeter to test all of the wires and confirm the power is off. Don’t forget also to use a non-contact voltage tester to touch each of the switch’s side screw terminals. If it happens that a voltage tester lights up at any time, return to the service panel and find the correct breaker to shut off the electricity because the voltage obviously still exists.
Next, remove the two screws that hold the switch to the junction box. These screws will allow you to use a straight or Phillips-tip screwdriver with which you can remove them. Carefully remove the switch from the box.
Step 3: Remove Existing Switch Wiring
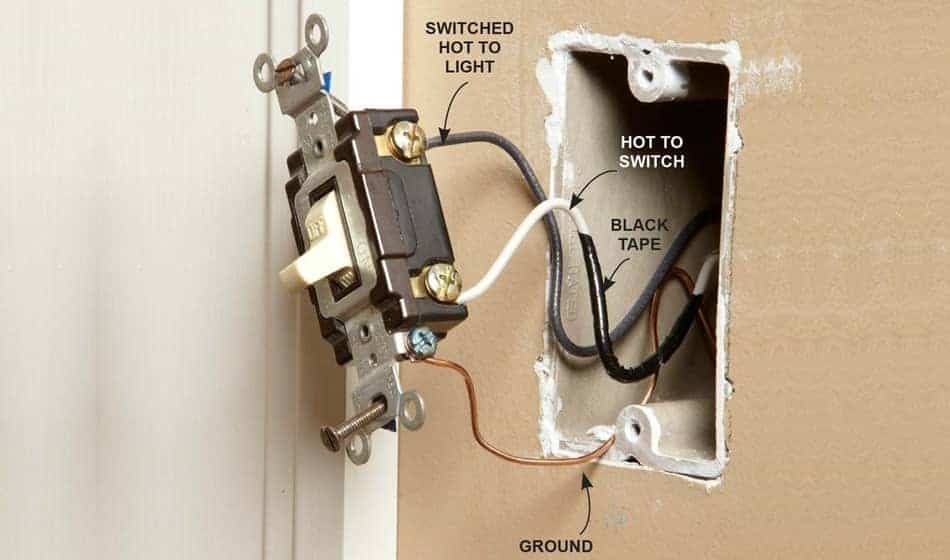
Light switch wiring. A single-pole switch is connected to three wires, a hot wire, a switchfoot, and a ground wire. There should be one wire for each terminal. If your switch doesn’t have all three wires, it’s time to change them right away. The hot wire is the power wire that is connected to the circuit breaker or fuse on the electrical panel. This wire is usually connected to one of the side brass terminals of the switch.
The switch branch is the wire that powers the switch light. When the switch is turned on, electricity passes through the switch to the light. This wire connects to the other brass terminal on the side of the switch.
The ground wire is either the bare or green wire and is connected to the green-colored screw on the switch. This screw is located at one end of the switch and is glued to the metal bracket of the switch which attaches to the box. Using a screwdriver, loosen the screws and remove the wires from the switch one at a time. It is a good idea to observe how the wires were connected before you disconnect them.
The „smart“ switches that are controlled by smartphones require a neutral wire because it provides them a wireless connection. This must be installed accordingly to the manufacturer’s directions.
TIP
Step 4: Install a New Single-Pole Switch
Once the old switch is removed, replace it with a new single-pole switch. Before you start, it is important to inspect the end of each wire and make sure that each wire has about ½ inch of bare wire at the end. If you find that end of the wire is in poor condition, trim the end off, and strip about ¾ inch of insulation with the help of wire strippers.
Start with the ground wire first. Connect the green or bare copper wire to the green screw on the switch. Then connect the hot wire and change the wires from the leg to the two brass-colored screws located on the side of the single-pole switch. Tighten the screws clockwise. This ensures that the wire opening tightens around the screw and does not open while tightening the screw. This is a very important step and makes all the difference in the world for a secure connection.
Tip: It is necessary that the metal switch box has a ground connection to the circuit wiring. The simplest way to do this is by grounding the box with two pigtail wires to the circuit ground. Connect one pigtail to the box’s ground screw and the other to the switch.
Step 5: Complete the Job
Wire a light switch needs to be done properly. Once a single-pole switch is wired correctly, take the switch with one hand and squeeze each of the wires to make sure they are connected properly. Gently push the excess wires into the junction box and gently press the switch into the opening. Use a screwdriver to screw the two screws on the switch into the mounting holes in the junction box. Make sure the switch is plumb when tightening the screws by using a level to straighten it. There is nothing worse than a twisted switch in plain sight.
Now put the cover plate back on the switch and install the two mounting screws. Again, we want a good replacement when we’re done. Restore the power by switching on the circuit breaker. Test the new switch and see if it is working.
Bonus:
If you are still not sure how to do it, then watch this step-by-step video because it will explain everything.
Final Thoughts
Light switch wiring is a trivial task. We could see that replacing the single-pole light switch is a very easy and quick task, and everyone can do it. The most important thing during this process is to make sure that the electricity is turned off in the circuit on which you will be working. Also, prepare the materials that we have stated above that are necessary for this procedure.
Many people think that this is a complex task and that they need an electrician for it, but it isn’t. It only takes a little faith in yourself and time. I hope that you have learned a new skill and that you will continue to follow us.
Related Questions
Do You Need an Electrician to Install a Light Switch?
No, you don’t need an electrician. Installing a light switch is easy and any homeowner can do if he is comfortable working with electricity. If you have never worked with electricity and you are not sure if you know what you are doing, then it is better to hire an electrician.
Does it Matter How You Wire a Light Switch?
Yes, it does matter! Every wire must go to the right place according to the instructions for a light switch to work properly. You can cause serious damage to your switch and even start a fire if the wires are not set correctly.
Does the hot wire get connected to the light switch?
Yes, the hot wire does get connected to the light switch. Keep in mind that there are also some light switch installations which have the neutral wire that is going to the switch.