
Sistering Floor Joists (Complete Guide)
The first home that I bought had highly unstable floors, and as soon as I moved in, I knew that I would need to fix that problem. The best solution that I could come up with and the most efficient one is to do the sistering the floor joists option.
Sistering floor joists is a technique in which you reinforce the existing joist by installing a new one on top of it, where we have the same measures as the present ones. In this article, we’ll explain everything you need to know about sistering floor joists, problems that can occur when doing it, how to install them, and when it is recommended to use them. So, let’s start!
Table of Contents
What Exactly Is Sistering Floor Joists?
If you are dealing with a flimsy floor joist, the simplest way of fixing it is to pair it with another piece of dimensional lumber, of the same measures like the old, flimsy one. The already existing joist is secured mechanically to the unstable joist, be it by pins or any other material which can be used to secure the two joists. Combining the two joists into a stable one is called “sistering”.
The most common method of sistering joists uses dimensional lumber, but it is not the only material or method which you can use to make your floor stable! OSB, hardwood, or metal sheets can all be used to combine the new and the old joist.
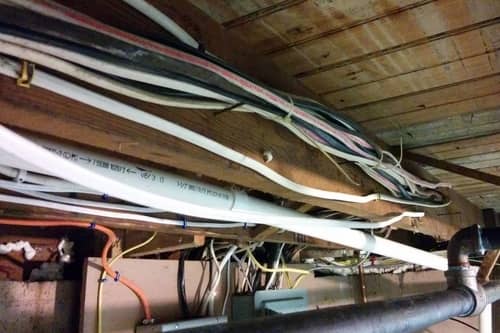
The downside of this effective method is; it can be a long and exhausting process because some of the ceilings, plumbing, and wiring could be needing reorganization if passing through the flimsy floor joist.
Why You Need To Use Sister a Floor Joist Method?
Sistering is not only used to fix unstable floor joists but also to fix old, used-up joists as well. Commonly, too big joist span, old, used up joists, or joists placed too far away from each other are the reason your floor is flimsy. Sistering joists will resolve any of the following problems:
- Reduce the floor trembling
- Increase floor stability and strengthen the old joists
- Fix the sagging joists
- Repair used and damaged floor joists
Sistering joists are the most common method of fixing a sagging floor. If your joists are too small or decaying, they will start being flimsy over time. If the space between two joists is too big (the joists are too far apart from each other), their support power is lower. If that is the case, sistering the old joist or joists with the new ones will fix your flimsy floor problem after putting them in the right place.
Inspecting the joists with your eye and finding that some are rotten or damped and damaged by moisture, then sistering those joints is necessary as they lose their stability and the amount of weight which they need to carry.
Building Code For Sistering Joists
It is not common for residential buildings to have sistered joists, as the regulations for residential buildings do not have the sistering joist codes. The only time sistering joists can be used is if the home has been badly damaged or if mistakes were made when the home was first constructed.
The regulations for the new joists and sistering joists are the following; 3″ is a minimum if going onto concrete, 1.5″ is a minimum if going onto the wood.
If a framing header is longer than 4″ connected to the joist, there must be sistered joists. Commonly used if joists that are running from a load-bearing wall all the way to the main beam, but cannot because of the stairs. In that case, those joists should be sistered in a next way – the framing header must be attached to joists on one of two sides. Then the joists must be sistered and should be supported on both ends; the wall or the support beam.
How Long Sistering Joists Need to Be?
There is no strict rule on how long does a sistered joist has to be, although an unwritten rule is that it should be at least ⅔ for it to be sufficient. With at least that length, it should fix your wobbly joists.
There is a way to partially sister your joists. You must have at least 3″ on either side of the damaged area. The farther you can get from the point with the sistered joist, the better the improvement.
The way you bind the joists together is the most important part of the process of sistering as the bindings will bear the weight of your original joist. The bindings on the ends of your joists will undergo the most pressure and there should be more bindings on the ends than on the center of the joists.
How The Proces of Sistering Joists Work
Sistering joists is a pretty simple procedure, to be honest. It can only become hard if you must detach other utilities or the original joist shrunk and does not fit the new joist. Here are the steps on how to sister joists:
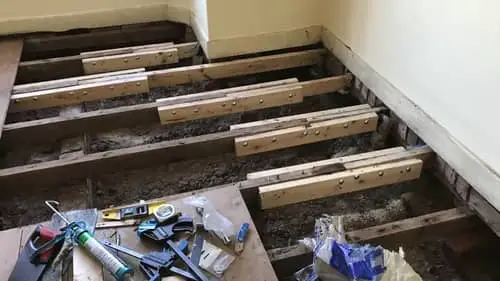
1. Remove Wiring and Other Obstructions
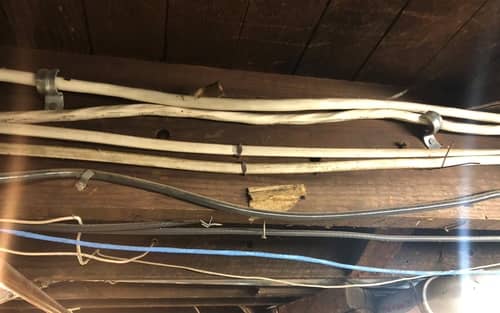
This is the most time-consuming part of sistering. The plumbing, HVAC, any other utility or wiring must be removed before you start.
Because everything has to be removed, people tend to partially sister the joists. This can work, but it is not better than fully sistering them and we do recommend that you fully sister the joists to achieve maximal support and stability.
2. Measure and Cut New Joists
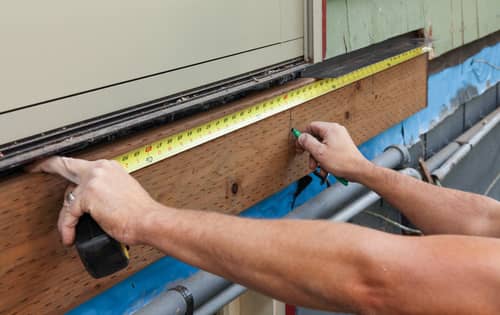
If your new sistering joists are of the same length as your old ones, then you have less work to do – just keep the same dimension as your old one. If making a partial joist, though, try using the ⅔ rule. Let’s say your old joist is 15″ – the new sistering joists should be a minimum of 10″. You should make sure that your new sistered joist is a minimum of 3″ on both sides of the deflection point.
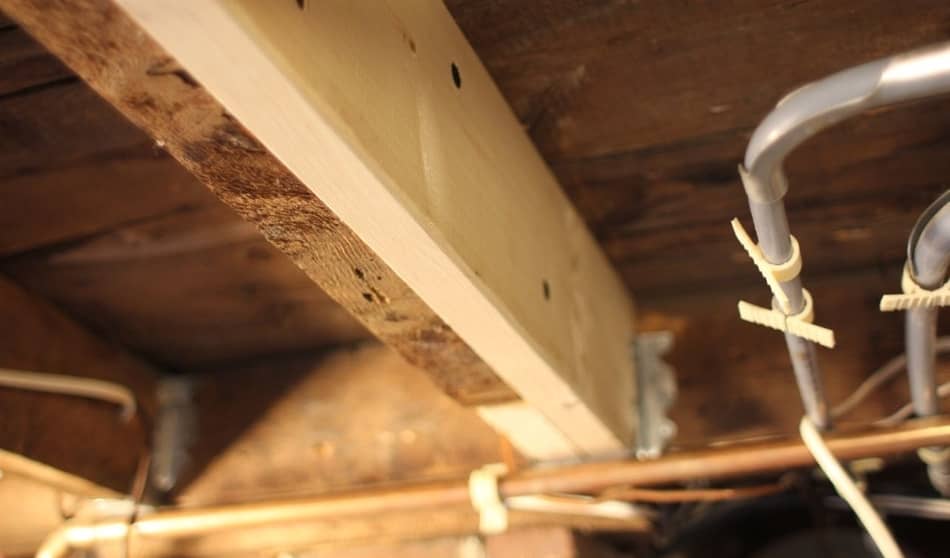
3. Fit the Sistered Joist
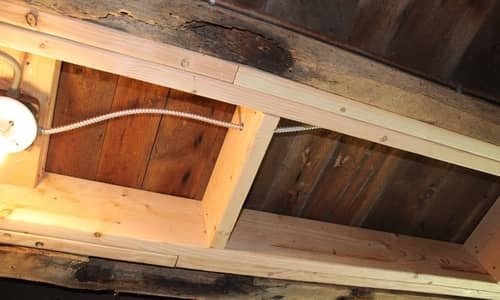
You must fit either end of the new sistered joist to the old one. It has to fit perfectly to achieve the best support and stability. There is a chance your old joists have shrunk in size over time, and a perfect sister joist that fits could be hard to find.
If you cannot secure the new sistered joists to the old one because of the very narrow space between – slowly and carefully rise the old joist at one of the bearings ends to fit in the new sistered joist in place. Be careful though, as you may damage the walls above.
You can bolt the old joist to the new one if partially joisting. Place the bolts on either end of the new sister joist and in the middle of it, then raise it up the other side of the new sister joist to perfectly fit the old one. Fit the bolts and check if everything is tight, in place, and stable.
4. Fasten Sister Joist
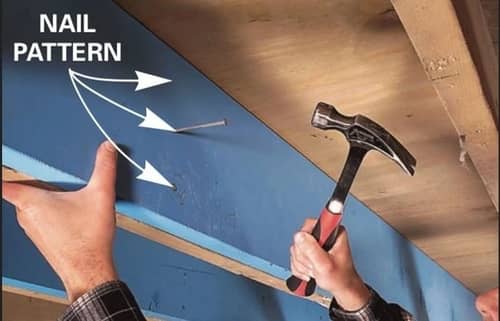
In our opinion, it is always better to use nails, pins, bolts, or fasteners than regular screws, as screws are far less stable and much weaker than the others above. Being 3.5″ long and holding two 1.5″ joists together, the 16d spiral nails are our first recommendation. The ends of the nails will stick out, just bend them back!
We also recommend rotating between the bottom, the middle, and the top of the joists when nailing the joists. It will fasten them harder. 3 nails should be put on either end, a few inches away from the end of the new partially sistered joists.
When you are fastening the joists with bolts, we recommend using 2 3″ lag bolts – every 24″ altering between the top and the bottom. If you do not have lag bolts, 4″ carriage bolts work just fine as well. Warning though; place them at least 2″ away from the edge of the new joists to avoid splitting.
Although the bolts, nails, and fasteners are the most important part in making your sister joists safe and stable, be sure to use a good amount of construction glue – as it will slightly improve the overall stability and the connection of your new sister joists.
5. Reinstall Utilities
When you are done with the bolting, the nailing, and the securing of your new sister joists together, be sure to check if it is stable, does not wobble, and is safe. When done with that, you can reinstall the utilities, the wiring, the piping, the plumbing, and everything you have removed before sistering.
Sistering Engineered Floor Joists
Although our guide is prioritized in explaining how to sister standard wood joists, here are quick guides on sistering the modern engineered floor joists and LVL joists; such as wobbling and unstability.
Engineered Wood I-Beams
As the I-beams do not always fit the dimensional lumber, it can be a problem to do sistering it with the lumber. The I-beams can have a rim with a narrow web. That means if you want to sister it, you have to add a padding piece and fit it in between the web and the new joist.
Being wider than the dimensional lumber, it is much easier to try and sister the I-beams with OSB boards or plywood. If doing so, we recommend sistering the l-beam with the full length of the old joist.
When filling the gap between the web of your I-beam and the edge of the rim, which is commonly about 1″, fill it up with plywood or an OSB board divided into two rows of ½”. Be sure to place the boards, so the gaps do not overlap. Then, 3/4″ plywood or OSB board is used as a sister joist.
Again, be sure to continue to place the boards, so they do not overlap the gap. As we have mentioned above, use a zig-zag pattern for nailing. The only difference between nailing of the I-beams and the wooden beams is; you will be using shorter nails. We recommend using the 8d nails.
LVL Floor Joists
One of the more expensive and the more uncommon floor joists are the LVL floor joists. It would be the best solution to find lumber of the same width as the LVL joists, but that will be unlikely, as the LVL joists are commonly longer than dimensional lumber. So you will probably have to partially sister your LVLs. If that is the case, the same steps are used in sistering the LVLs as it would be with sistering dimensional lumber.
Final Thoughts
The hardest part in the whole sistering of your wobbly joist is, there are no strict rules that you can follow. Every joist, every wall, and every floor can be different and the solution you used, might not be helpful to someone else.
You can use our guide for helpful tips and tricks, but be sure to contact an engineer or a manufacturer to hear their opinion and viewpoint on how to fix your loose joist. The fundamental pieces of your home are the joists, so when repairing them, be careful and take them seriously. Not fixing the joists properly can cause cracked walls, unstable floors,s, and cragged living space.