
How to Repair a Bathroom Fan? Step-by-Step Guide
The bathroom is one of those places in the apartment that just needs good ventilation. A bathroom fan not only removes moisture and unwanted odors, but it also reduces mold problems, warping of doors and windows, and removes fogging from the mirror. Over time, an old fan wears out, and it is worth replacing it with a quieter model with greater capacity.
Please note that if your property was built after 2012, there must be a fan in the bathroom. So how to repair, install, or replace your bathroom fan. In this article, we will explain how to repair your bathroom fan with a step by step guide.
So How to Repair a Bathroom Fan? To repair a bathroom fan you need to remove the grille, look at which model it is, and unplug it from electric source. After you turn off the fan’s motor, you need to remove the plate by removing screws and take them out together with the blower wheel from the shaft. Install the new motor and reattach the other parts.
The connections on this task are simple; however, it is not easy to work on the ceiling to remove the old device. Be sure to wear gloves , long sleeves, a cap, and respiratory and eye protection – drops of insulation are inevitable. Choose the lowest sound rating (0.5 is almost silent, 4.0 is about as loud as a TV) you can buy. Before you begin to repair a bathroom fan, turn off the power at the electrical panel.
| Required Things For Bathroom Fan Repair |
|---|
| Time: 60 minutes |
| Complexity: Moderate |
| Cost: $50 – $100 |
| Other: Tools and materials |
Table of Contents
How To Test If Your Bathroom Fan Is Working?
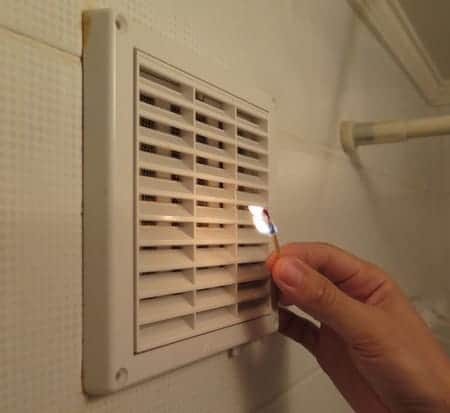
TEST 1: The easiest way to diagnose the bathroom fan at home is by checking it with fire. You need to take a lit match, a lighter, or a candle and carefully bring the flame to the grill of the ventilation duct, which removes the exhaust air from the bathroom. If the fire is extinguished immediately after you put it to the grill, then everything is correct. If the fire continues to burn, then there is a problem with the ventilation system.
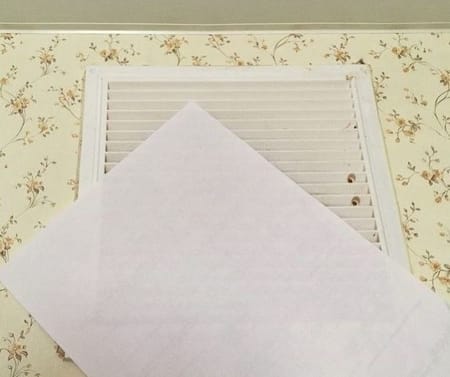
TEST 2: A safer way is testing with a thin sheet of paper. As in the previous case, it is brought to the air vent. The paper is taken at the lower tip and held upright near the grate. If the paper is strongly attracted to and held by the grate, ventilation works well. A short sticking or slight deviation towards the hole indicates weak traction. If nothing happens and the sheet remains motionless, the system is faulty. Paper repulsion is a sign of back pull.
Workspace Preparation
- Protect the floor with a sheet or tarp under the location of your fan.
- Turn off the bathroom power from your electrical panel.
- Prepare your tools.
How To Repair a Bathroom Fan? Step-By-Step Guide
The easiest way to replace a burned-out motor that stopped running is to first shut him off the power. The next thing you need to do is to open up the fan, see the model of that motor, and replace it with a new fan motor. These types of fan motors are usually plugged into an outlet and no electrical wiring is required.
Therefore, if you find yourself in a situation where your bathroom fan stops working, you can very easily replace it with a new fan motor in a very quick time. In addition to saving money by doing it yourself, you will also learn something new. When you change the fan motor, you don’t have to replace the whole unit, just the motor. Sometimes a new motor can cost the same as a new fan system, but replacing them is very simple and trivial.
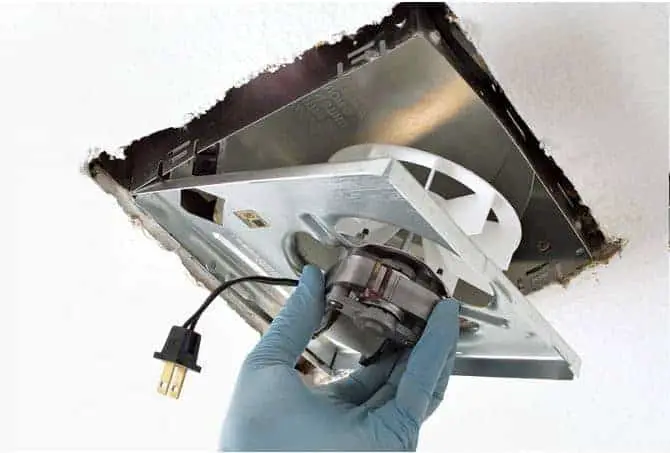
Step 1: Open Up The Fan
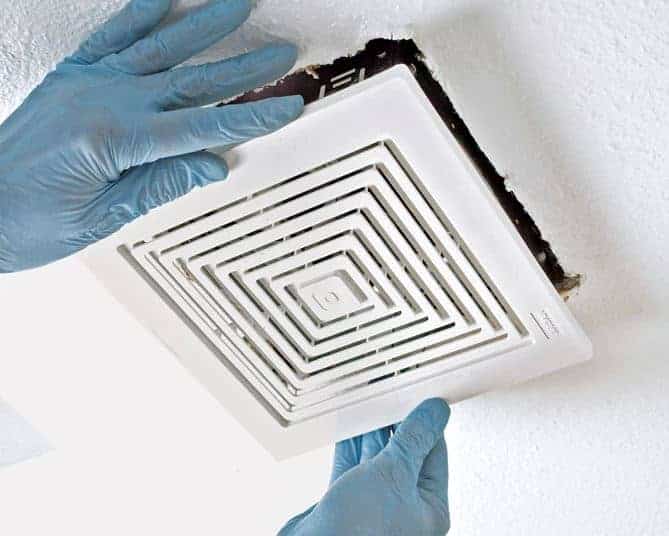
The first thing you need to do is to remove the grille and clean away the dust. The grille is most often attached by spring clips. After that, it is necessary to see the fan’s model number and write it down. That number is usually located on the housing units. Look for the same model on the Internet or at the nearest convenience store.
Step 2: Turn Off The Power & Disconnect the Fan From Electric Source
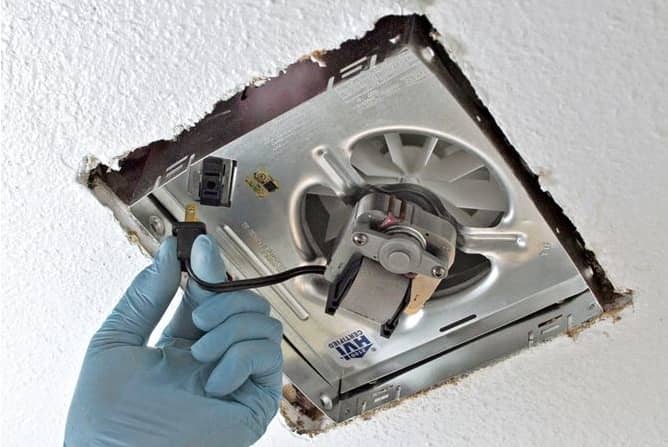
The next step is to unplug the fan from the electrical source and turn off the power. Most of these motors have a simple plug that is inserted into an electrical outlet. (Use a voltmeter to confirm that the power is off.) If the fan motor is connected via a hardwire to the electrical system, you need to disconnect them from the fan motor and ensure you remember where each wire goes when you put the new fan motor.
Step 3: Remove The Fan’s Motor Plate
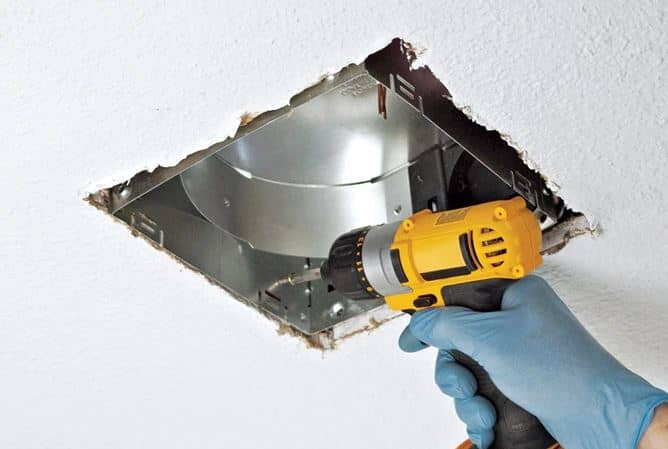
To safely and easily remove the plate, loosen the fixing screws, and take them out. Generally, the screws are only on one side. After that, gently grab the motor plate and pull it towards you, it should pop out.
Step 4: Remove The Blower Wheel From the Shaft
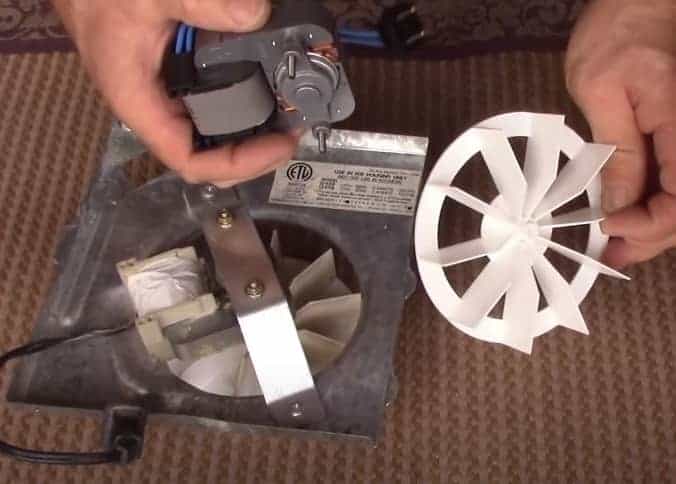
After you have removed the fan’s motor plate, you need to remove the blower wheel from the shaft. You will do this by unscrewing it or you just simply slid it off from the shaft.
Step 5: Install The New Motor
Before you start installing a new fan motor, make sure that the main circuit breaker is off and that there is no power on. The installation is identical to the beginning when you removed the fan’s motor. Screw the fan grille plate and connect the fan plug to the power outlet. (If you can access the fan housing from the attic, replace the insulation that you moved during installation)
Required Tools for Bathroom Fan Repair
- Screwdriver
- Hammer
- Mask
- Safety glasses
- Protective gloves
- Drill bit set – cordless
- Wire connectors
- Manual scaffold or ladder
- Utility knife
Go up into the attic and check that the ventilation ducts direct the air to the outside, and not in the attic – a situation that can cause an invasion of mold.
CAUTION!
This equipment can be found on Amazon, so check it out!
Duct Must Run outside the Attic To Prevent Roof Rot
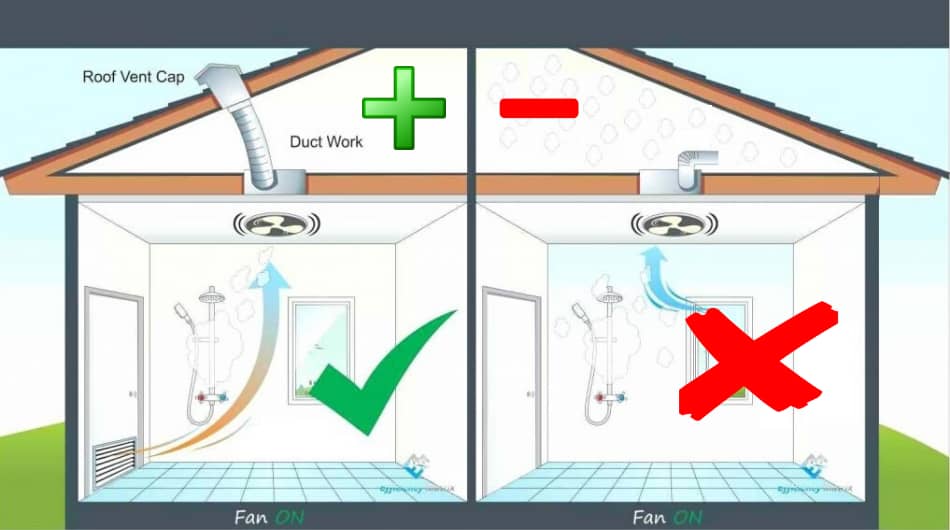
If you have the bathroom under the attic, you need to make sure your duct is set up so that it leads all the way to the roof. Some installers make big mistakes when installing a bathroom fan and end the duct inside the attic. Due to this mistake, moist air accumulates up in the attic and causes wood rot. In the winter, when it snows, the snow melts up in the attic, and that water can damage the ceilings in the house.
If your current fan installation does not conduct a duct to the roof and ends up in your attic, it’s not a complex job. If you decide on that job, remember that it would be wise to replace the fan. If the duct is not carried to the roof, the attic can become dangerously hot during the summer and it would not be wise to work in such situations, so you should choose a cooler day. It would be desirable to have an eye protection mask. Find a good location where you can pull the duct to the roof and that’s it.
You can also check one interesting article that I write, How to Install Motion Sensor Light in a Bathroom.
Signs And Causes of Bathroom Fan Failure
When the ventilation system does not cope with its functions, problems arise. This affects the comfort of residents and can result in unpleasant health consequences. The disturbed air exchange in the bathroom can be judged by the following signs:
- high humidity;
- Settling of abundant condensation on the mirrors and walls of the bathroom;
- unpleasant musty smells;
- rust formation on metal surfaces;
- destruction of finishing materials and “swelling” of furniture coatings;
- the appearance of fungus and mold on the ceiling, walls and corners;
- hood in the bathroom blowing in the opposite direction;
- loud noise from the ducts.
How To Look For The New Bathroom Fan
- Measure the hole in your current fan, or just bring the cover to shop. Be aware that if the new device is smaller or larger, you will still be able to make the adjustment.
- If the new fan is smaller, screw a piece of drywall the size of the butcher section to a longer piece of wood and insert it into the opening.
- If the new unit is larger, press the fan housing (not the cover) flat on the ceiling and trace the outline. Then cut with a gypsum saw (or an Exacto type precision knife).
Conclusion
Following our step-by-step guide in this article, you can see how easy it is to replace a bathroom fan. If a loud or abnormal noise is heard the first time, turn off the power and make sure everything is plugged in and secure.
If you run into problems and your ventilation does not work, try to determine the cause of the malfunction and use our guide for repairing and optimizing your bathroom fan system. I hope this article helped you and if you have any questions feel free to write below.