
Should You Install Stair Treads or Risers First?
When I was finishing off the steps in my basement, I made a huge mistake. Not knowing whether to install stair treads or risers first, I set out and installed the treads first. I didn’t believe it made a big difference, so I placed all of the risers first, followed by the treads. Big mistake! This article will explain why this approach is wrong and what you need to do.
Table of Contents
Should You Install Stair Treads or Risers First?
So, Should You Install Stair Treads or Risers First? The right approach when installing stairs is to place the riser first, and then follow with the tread. Start from the bottom of the stairs and continue to work your way up. Be sure that the back of each tread fits perfectly against the riser. Use construction adhesive to secure them.
Different kinds of stair treads require different installation processes. The ‘risers before treads’ method result in a solid set of stairs for typical stair treads and risers and can be purchased at any home renovation store. Now we’ll go a little bit deeper into installing stair risers and treads, as well as the attaching methods that are avaible.
For those who want to learn more, be sure to read How To Clean Carpet On Stairs (Even Without a Machine).
Why do Stair Risers need To Be Installed First?
When we talk about “install stair risers first”, it doesn’t mean that you need to install ALL the risers before the treads. By saying ‘install risers first’ we are referring that you start by the bottom two risers. After you’ve done that, you install the first tread which goes atop the bottom riser and against the riser behind the tread. This way the tread will sit on top of the riser. This method allows a tight connection between the tread and the riser without any gaps.
All of the risers will be positioned behind the tread, where the tread flat will be placed against the riser’s face. This method enables you to drill through the flooring, which creates a solid link between the two.
Installing the riser first helps you to level the tread correctly. If stair stringers aren’t in level (which is quite often the case), and if you put the tread on first, you’ll have to adjust it. However, if you install the riser first, you may use your level to raise your riser to a height that will make your stair tread straight.
In summary, let’s see the pros and cons of this approach;
Pros
- The fit for the tread/riser is more snug
- Risers may be fixed to treads
- Treads are easier to level
Cons
- Your treads may require further cutting
- The riser does not hide the tread’s cut edge
Related Article: How to Remove Glued Down Wood Flooring From Subfloor
Can You Install Stair Treads First?
Almost everyone who is familiar with stair installations will tell you that you should put the risers first. However, there are a few advantages to setting your treads first. Pre-fabricated stair treads, for instance, are most likely to be 11 ½” wide. If your stringers or stair flooring subfloor the conventional 7” x 11” rise overrun (which is pretty common nowadays) you may not even need to cut them end-to-end.
Another advantage that you have here is that if you trim your stair treads to suit a narrower width, for example, such as, say, 10 ½”, you may hide the cut end behind the risers. A cut made in the factory is always far cleaner than one made with a circular or table saw. As a result, some cutout or tearing may occur due to your longitudinal cut. The riser above it will cover this.
Let’s sum up the pros and cons of this method;
Pros
- Treads may not need to be trimmed lengthwise
- Cuts can be hidden behind the riser.
Cons
- Risers won’t fit between treads as good as in the previous method
- Risers cannot be attached to treads
- Risers cannot be used to level treads
Related Article: How To Fix Steep Stairs Little Headroom
Should You Install Stair Treads and Risers First?
Putting your risers first has proven to be more efficient than going the other way around. Of course, in a best-case scenario where you have everything in the level, you could choose either method of these two, and they would both work just fine. However, even if this were the case, installing risers first would last longer than putting tread first. Let’s explain the reason behind this.
1. Durability
If you want to have a more durable set of stairs, you should install the risers first. Going with risers first allows you to cut them to suit the whole face of the stair tread, from the beginning to the end. Therefore, the tread firmly fits against the riser, rather than the flooring or the stringer.
As a result, you can seal the riser and tread to the flooring by drilling through the flooring, riser, and the stair tread from beneath your staircase, making the stairs a lot sturdier. Remember that because you’ve covered the bottom of the riser with the tread, the chances of it falling apart are little to none. This is significant since staircases are subjected to greater damage than almost any other part of your home.
2. Aesthetics
Installing your risers first is the best choice if you want your stairs to have a precise, and great “look” with no spaces between stair components.
If you decide to put your treads before your risers, you’ll have to squeeze the risers between the treads. Choosing this method also puts you at risk of having a riser that doesn’t properly fit between the treads. This will happen if your flooring or stair stringers are out of level. This will cause visible holes, which you’ll have to cover with wood filler or caulk, where both of these are pretty bad solutions.
You may also level the treads by installing the riser first. Get your level and place it against the rear of the second riser and on top of the first riser once you’ve installed your first two risers. In case you need to make any adjustments, just remove the bottom riser, trim it to fit, and install it back again. You’ll have a flawlessly level tread as a result.
3. Ease of Installation
Installing your risers first is way easier than going the other way around, even if it doesn’t seem like it. Your tread installation will take longer, no matter the sequence in which you install them. You want your treads to be as tight as possible, considering that they are the main focus of your staircase. However, after you’ve placed the treads, you’ll need to spend just as much effort making sure the riser cuts are perfect so that you avoid having any space in between.
To avoid all of the trouble this you may have, install the risers first, then the treads. You’ll have a lot more space for mistakes on the bottom of the riser because it will sit beneath the treads. Since you’ll merely disguise the cut anyhow, this method speeds up your installation. It’s a lot easier to do this than trying to fit the riser between the treads.
Related Article: 5 Easy Steps to Fix A Leaky Window
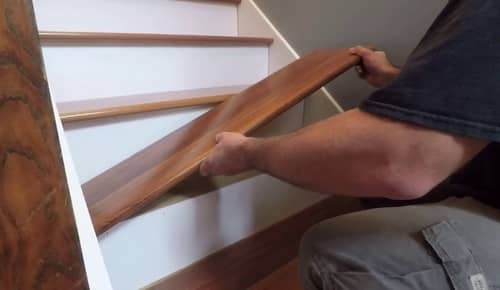
How to Install Stair Treads and Risers
The whole process of installing stair treads and rises will usually take you a full day, unless you are opting for a railing option which can take up to two to three days, depending on the complexity.
The majority of people approach this process by starting at the bottom and moving towards the top of the staircase. Because the top step may require a transition component or further work to blend in with the flooring on the upper level, it’s best to complete the stairs up until that point before adding the finishing touches.
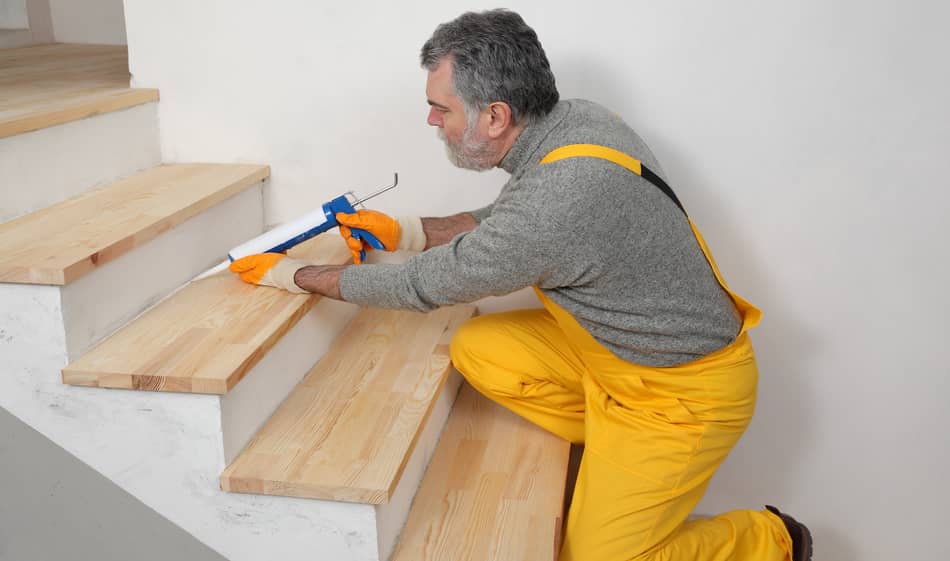
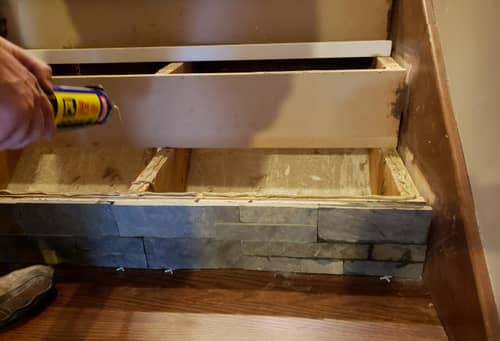
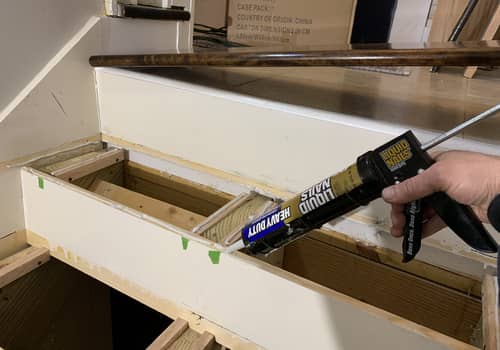
You should be aware that your installation will require the use of screws, nails, and construction adhesive. Don’t forget about the glue, since it is the most crucial component of your installation. You want your stairs to be as sturdy as possible, considering that staircases are exposed to a lot of damage, as we mentioned earlier.
For drilling the risers and treads into the flooring, you’ll need access to the rear of your staircase. If this isn’t doable, just make sure the risers are face-nailed into the stringers. A finishing nailer will be useful to have when you consider that you will have to use a lot of nails. If you don’t have it, you can either ask a friend, go to the rental shop at your local home renovation store, or you can spend a little extra money and buy one since you’ll most definitely use it in the future.
Finally, you’ll need a lot of wood filler. When purchasing them, make sure you pick the filler that fits the wood color and kind of treads and risers.
How To Install Treads and Risers over Existing Stairs
If you want to replace the risers and the treads on your existing stairs, keep in mind that the top and the bottom stair will be out of proportion with the rest of the stairs.
It’s possible to install treads and rises over existing stairs, however, keep in mind that the height of the steps will stay the same. For instance, if your stairs are 7.5” tall and you choose to replace them with new treads that are ¾ ” thick, your last step will only be 6 ¾ ” high, which is far too low for a step. While the first or the bottom step will be larger- 8 ¼ ”.
The ideal method to remove your stairs is to start with a blank slate since you won’t have to deal with attaching your new treads and risers to the old ones. Remove the old stair treads and risers to uncover either the flooring or the original stair stringers, if there are ones.
FAQ: People Also Ask
Why is nosing required on stairs?
Walking up and down the stairs is significantly simpler with nosing since there is a wider surface on which you can stand. The most vulnerable sections of the stair tread are protected from damage and wear with a stair nosing. This is especially crucial on wooden and concrete stairs since heavy use can cause the tread to crack or break.
What is the code for stair treads?
Residential stairs should have a tread depth of a minimum of 10” with nosing and at least 11” without nosing, with a maximum variation of no more than 3/8’’.
Final Thoughts
When working with older homes, stair installation can easily become complicated. Be sure to check the manufacturer’s instructions for the new materials you bought before you start to actually install them on the stair risers and treads.
The installation instructions may differ from the ones I’ve listed above depending on the type of your treads and risers. Some of them have their own set of guidelines, however, if this isn’t the case put the first two risers first, then switch between treads and risers. Make sure you double-check your measurements before cutting them and that your treads are level before going on to the next one. Slow down and be precise so you save yourself from doing Sisyphus’ work.
Thank you for reading this article! I hope it was useful in assisting you with your stair construction. If you have any questions regarding your stair construction or maybe some other home renovation plan, feel free to send us an email or leave a comment down below.